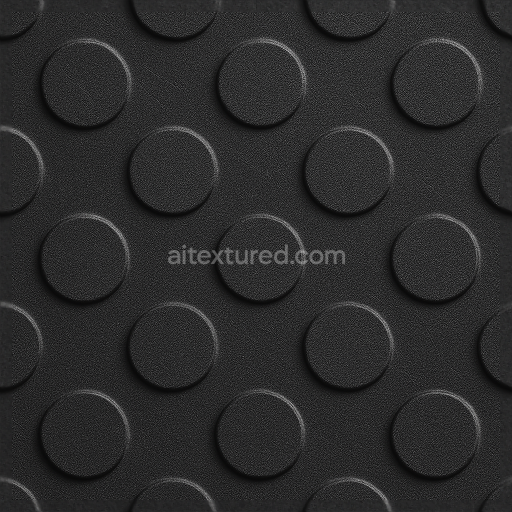
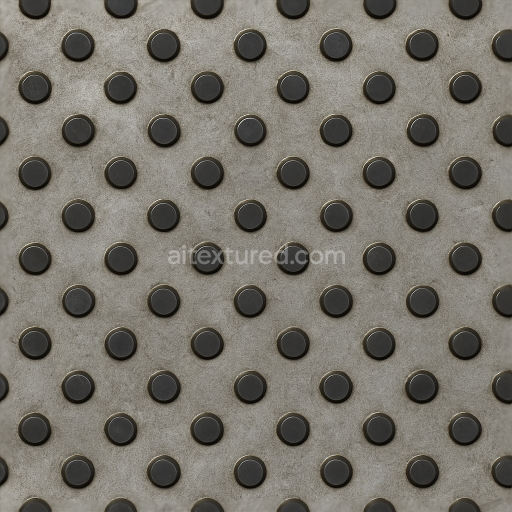
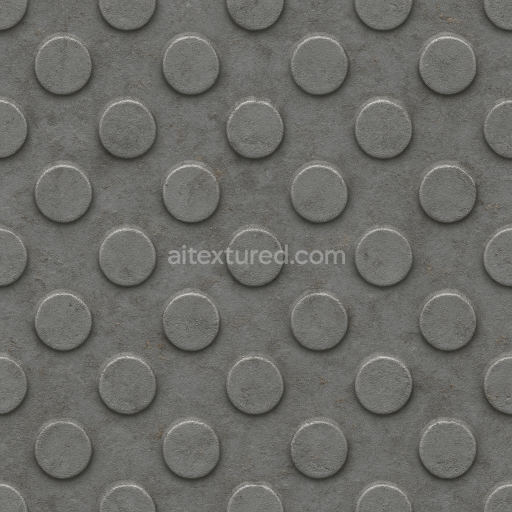
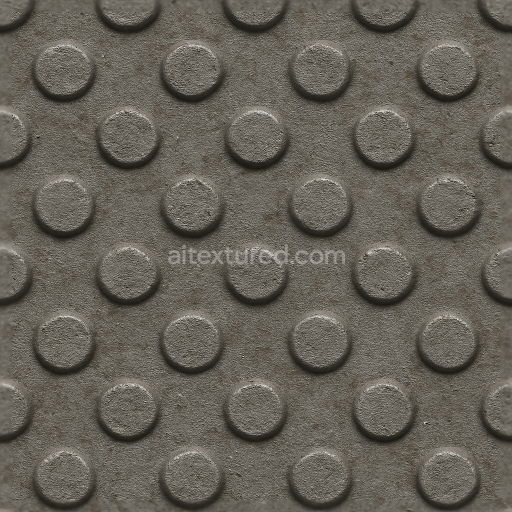
Tactile Plate With Tactile Ridges And Powder Coated Charcoal Black Surface
Seamless texture (tileable) · PNG, WEBP, PBR ZIP. License: AITextured Free Commercial License (FCL) v1.1. Free personal and commercial use. Raw resale, standalone redistribution, mirroring/scraping, competing asset packs, and AI/ML training are not allowed without written permission. Attribution is not required, but appreciated..

| ID | seamless-3d-texture-pbr-8k-tactile-plate-with-diamond-plate-surface-and-matte-finish |
|---|---|
| Category | Tactile Plate |
| Formats | PNG, WEBP, PBR ZIP |
| Size | 1k (1024x1024px), 2k (2048x2048px), 4k (4096x4096px), 8k (8192x8192px) |
| Color | sRGB |
| Tileable | Yes |
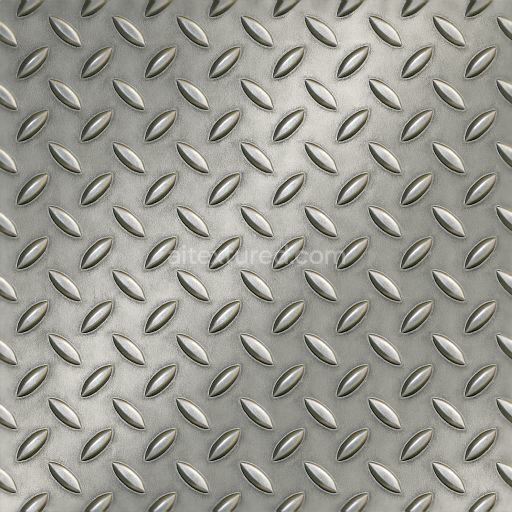
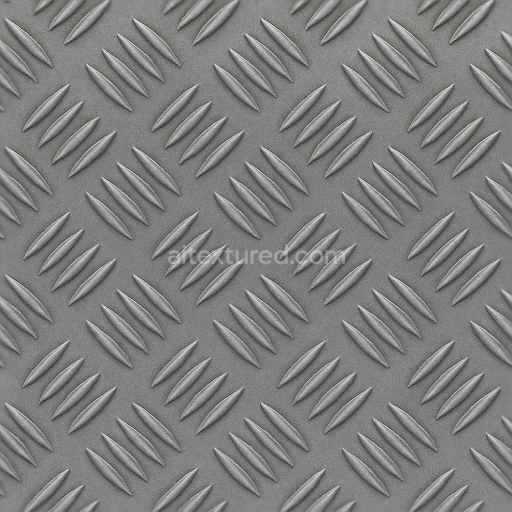
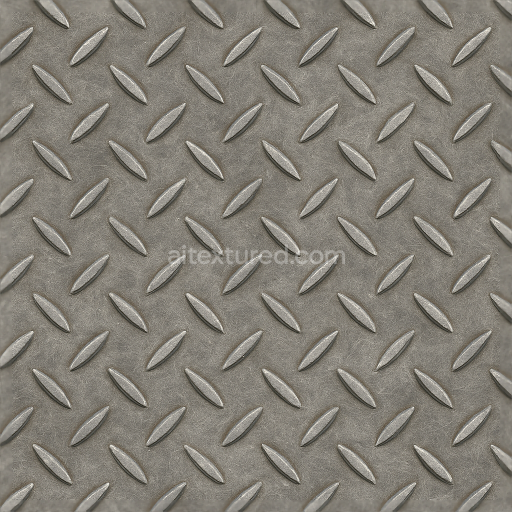
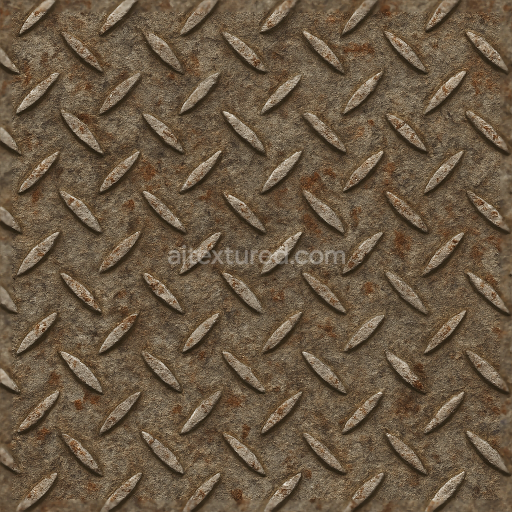
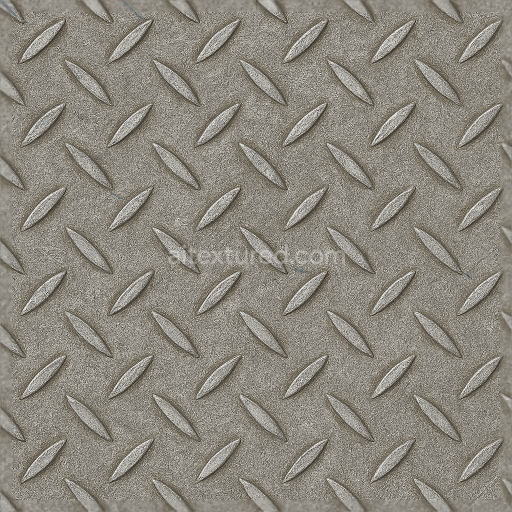
This seamless 3D texture presents a photorealistic PBR diamond plate surface crafted from industrial metal designed specifically for heavy-duty applications requiring enhanced floor safety and anti-skid properties. The base material is a robust steel substrate characterized by a cold-rolled finish with a subtle layer of oxide and fine surface grit that replicates natural wear and weathering. This tactile plate texture captures the intricate grain orientation and raised diamond patterns typical of industrial steel plates offering realistic micro-roughness and a matte finish that minimizes reflections. The steel gray tone is achieved through carefully calibrated base color pigments and oxide layers delivering a balanced neutral metallic appearance that complements modern industrial aesthetics. Adhesive and binder qualities are implicitly reflected in the texture’s ambient occlusion and roughness channels simulating the slight accumulation of grime and surface imperfections found on well-used metal plates.
The texture’s PBR channels are meticulously mapped to ensure authentic material response: the BaseColor/Albedo channel provides the neutral steel gray with subtle variations mimicking oxidation and wear; the Normal map accentuates the raised diamond plate geometry and fine surface detail; Roughness is tuned to convey the matte finish optimizing grip and reducing unwanted gloss; the Metallic channel confirms the high metal content of the substrate; Ambient Occlusion enhances depth perception around the plate’s embossments; and Height/Displacement maps enable realistic parallax effects for enhanced tactile fidelity. Rendered at an impressive 8K resolution this texture supports ultra-detailed close-ups and large-scale visualizations while maintaining seamless tiling for continuous surface application. It is fully compatible and unreal Blender and Unity ready allowing for straightforward integration into industrial visualizations commercial infrastructure projects and public walkway designs.
For practical use it is recommended to carefully adjust the UV scale to match real-world diamond plate dimensions ensuring the pattern’s tactile qualities translate accurately in your scene. Additionally fine-tuning the roughness channel can help balance the anti-skid effect visually making the surface appear appropriately worn or freshly installed depending on your project needs. This seamless 3D PBR matte finish diamond plate texture is ideal for creating realistic industrial metal surfaces that emphasize safety functionality and visual authenticity in any heavy-duty environment or pedestrian guide application.
Import the texture maps into Blender with sRGB color space for albedo/base color and Non-Color for normal, roughness, metallic, AO, height, and ORM maps. Connect normal maps through a Normal Map node, then adjust UV scale with a Mapping node so the material repeats naturally on your model.
For the full step-by-step setup, see How to Use Seamless Textures in Blender. Browse related material examples in wood, concrete, and metal.
Yes. This texture is designed as a seamless tileable PBR material, so it can repeat across large surfaces without visible borders.
You can download PNG/WEBP versions and use 1K, 2K, 4K and 8K download options when available on the page.
Yes. The download options and engine-mapped ZIP workflow are designed for Blender, Unreal Engine, Unity Standard, URP and HDRP material pipelines.
Yes. The texture is available under the AITextured free commercial license. Review the license page for redistribution and AI-training restrictions.

Build, preview, and export seamless PBR materials. Generate full map sets from a single image, inspect them in a real-time WebGL viewer, and re-package maps for Unreal, Unity, and Blender—directly in your browser.
AI text-to-texture: type a prompt and get a seamless, tileable base image ready for PBR workflows (great starting point for materials).
Create a full PBR set (Normal, Roughness, AO, Metallic, etc.) from a single image. Seamless and tiling-friendly.
Instant WebGL viewer: inspect materials on a sphere, plane, and cube. Check tiling and lighting in real time.
Re-packages maps per engine: Unreal (BaseColor + ORM), Unity (Mask/MetallicSmoothness), Blender (separate channels).
PNG ↔ JPG ↔ SVG: fast convert, SVG rasterize, embed/trace options, quality & background controls.