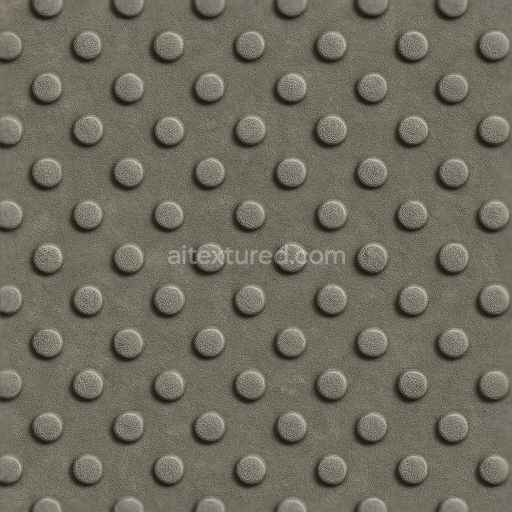
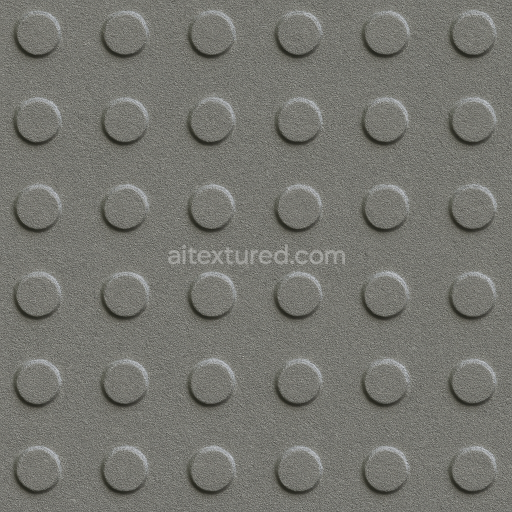
Tactile Plate With Raised Bumps And Matte Finish
Seamless texture (tileable) · PNG, WEBP, PBR ZIP. License: AITextured Free Commercial License (FCL) v1.1. Free personal and commercial use. Raw resale, standalone redistribution, mirroring/scraping, competing asset packs, and AI/ML training are not allowed without written permission. Attribution is not required, but appreciated..

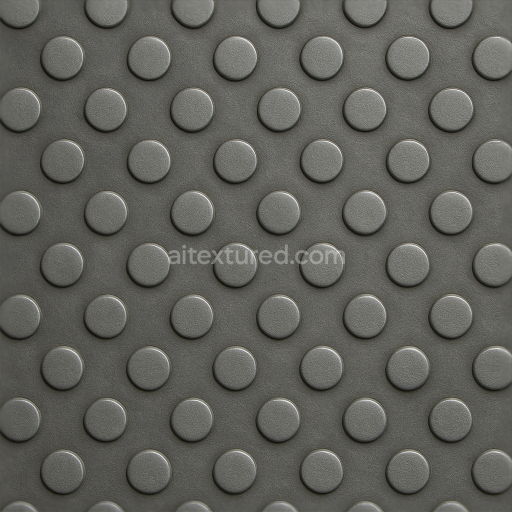
| ID | seamless-3d-texture-pbr-8k-tactile-plate-with-raised-dots-and-steel-gray-finish |
|---|---|
| Category | Tactile Plate |
| Formats | PNG, WEBP, PBR ZIP |
| Size | 1k (1024x1024px), 2k (2048x2048px), 4k (4096x4096px), 8k (8192x8192px) |
| Color | sRGB |
| Tileable | Yes |
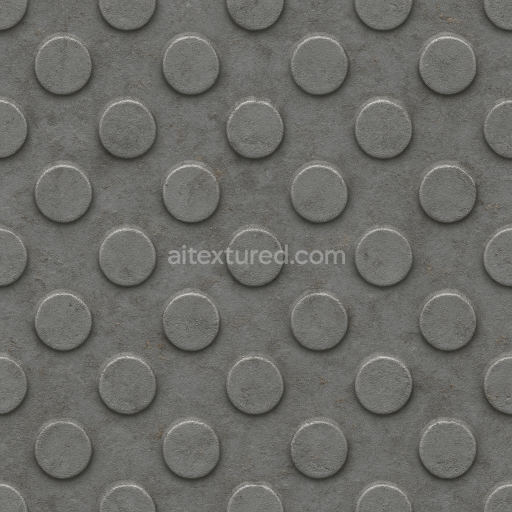
This seamless 3D texture is a meticulously crafted PBR asset featuring a steel gray metal plate adorned with an evenly distributed pattern of raised dots. The base material is a robust industrial-grade metal combining a dense alloy substrate with a finely brushed surface finish that subtly diffuses light to create a matte effect. The steel gray coloration results from a controlled oxide layer and integrated pigments that enhance durability and resist corrosion. The raised dots formed through precision embossing or stamping add a textured metal grip surface designed for tactile feedback and slip resistance. These features emphasize the plate’s heavy-duty utilitarian nature making it ideal for environments requiring both function and longevity such as public infrastructure and safety applications.
At an ultra-high 8K resolution this texture captures every nuance of the metal plate’s surface qualities with photorealistic fidelity. The PBR workflow accurately represents material properties across multiple texture maps: the BaseColor channel conveys the nuanced steel gray tone with subtle variations and wear patterns; the Normal map enhances the three-dimensional raised dots and fine surface abrasions; Roughness maps define the matte finish with slight irregularities to suggest natural wear; Metallic values confirm the plate’s metal composition lending authentic reflectivity; Ambient Occlusion adds depth to crevices around the dots; and the Height/Displacement channel enables realistic parallax effects enhancing tactile perception in 3D renders. This comprehensive channel setup ensures seamless integration in Unreal Engine Blender and Unity projects supporting realistic lighting and shading in industrial or architectural visualization.
Designed for seamless tiling this 3D texture ensures a continuous non-repetitive appearance across large surfaces such as floor plates tactile paving or safety panels. The uniformity of the raised dots combined with the subtle weathering and wear patterns lends a believable functional aesthetic without distracting visual breaks. For optimal practical use it is recommended to adjust the UV scale based on the intended real-world application size and to fine-tune roughness to balance the grip and reflectivity according to lighting conditions. This approach maximizes the texture’s versatility whether used in close-up renders or expansive industrial scenes ensuring both high performance and photorealistic detail at any scale.
Import the texture maps into Blender with sRGB color space for albedo/base color and Non-Color for normal, roughness, metallic, AO, height, and ORM maps. Connect normal maps through a Normal Map node, then adjust UV scale with a Mapping node so the material repeats naturally on your model.
For the full step-by-step setup, see How to Use Seamless Textures in Blender. Browse related material examples in wood, concrete, and metal.
Yes. This texture is designed as a seamless tileable PBR material, so it can repeat across large surfaces without visible borders.
You can download PNG/WEBP versions and use 1K, 2K, 4K and 8K download options when available on the page.
Yes. The download options and engine-mapped ZIP workflow are designed for Blender, Unreal Engine, Unity Standard, URP and HDRP material pipelines.
Yes. The texture is available under the AITextured free commercial license. Review the license page for redistribution and AI-training restrictions.


Build, preview, and export seamless PBR materials. Generate full map sets from a single image, inspect them in a real-time WebGL viewer, and re-package maps for Unreal, Unity, and Blender—directly in your browser.
AI text-to-texture: type a prompt and get a seamless, tileable base image ready for PBR workflows (great starting point for materials).
Create a full PBR set (Normal, Roughness, AO, Metallic, etc.) from a single image. Seamless and tiling-friendly.
Instant WebGL viewer: inspect materials on a sphere, plane, and cube. Check tiling and lighting in real time.
Re-packages maps per engine: Unreal (BaseColor + ORM), Unity (Mask/MetallicSmoothness), Blender (separate channels).
PNG ↔ JPG ↔ SVG: fast convert, SVG rasterize, embed/trace options, quality & background controls.