
Snowman Texture Felt Fabric Felt Santa Christmas Stocking Red Ribbon
Seamless texture (tileable) · PNG, WEBP, PBR ZIP. License: AITextured Free Commercial License (FCL) v1.1. Free personal and commercial use. Raw resale, standalone redistribution, mirroring/scraping, competing asset packs, and AI/ML training are not allowed without written permission. Attribution is not required, but appreciated..

| ID | seamless-3d-texture-pbr-8k-festive-plaid-christmas-plaid-holiday-plaid-scarlet-fabric |
|---|---|
| Category | Merry christmas |
| Formats | PNG, WEBP, PBR ZIP |
| Size | 1k (1024x1024px), 2k (2048x2048px), 4k (4096x4096px), 8k (8192x8192px) |
| Color | sRGB |
| Tileable | Yes |
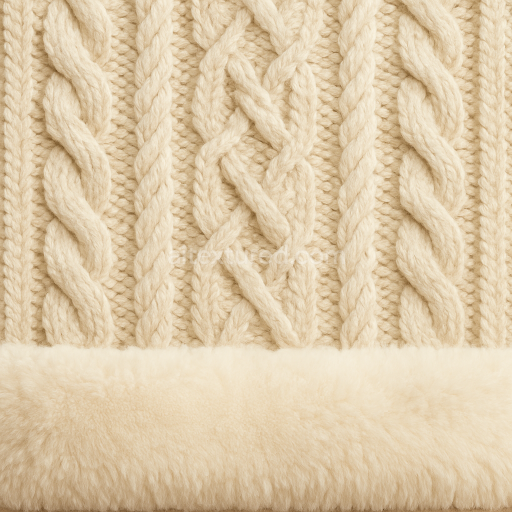
This seamless 3D texture showcases a classic holiday plaid pattern rendered in vivid scarlet hues that evoke the warmth and tradition of festive Christmas fabrics. The base material is a finely woven wool knit characterized by its soft fibrous surface and subtle textural irregularities typical of natural yarns. The fabric's structure reveals an interlaced tartan pattern formed by alternating bands of colored fibers creating a geometric grid that is both visually striking and authentic. The weave density and fiber orientation contribute to a tactile depth with visible knit loops and slight variations in thickness enhancing the realistic appearance.
The composition simulates a natural wool substrate where tightly spun fibers are held together by protein-based binders intrinsic to wool lending elasticity and resilience to the fabric. The texture captures the interplay of scarlet deep reds greens and whites characteristic of holiday plaid achieved through pigment diffusion within the fiber matrix rather than surface coating producing subtle color gradients and soft shadows. Surface porosity is minimal but perceptible allowing for slight light absorption and scattering which lends the material a cozy matte finish without glossiness. Weathering effects are intentionally minimal to maintain a fresh pristine holiday aesthetic with no visible wear or pilling.
In terms of physically based rendering (PBR) the BaseColor (Albedo) map accurately reproduces the vibrant scarlet and complementary hues of the plaid design while the Normal map encodes the delicate knit patterns and fabric folds adding realistic relief and depth. The Roughness map reflects the wool's natural matte surface providing a soft diffusion of light with no metallic shine which is why the Metallic channel is set to zero. Ambient Occlusion enhances the perception of interwoven threads and subtle crevices within the knit. The Height or Displacement map emphasizes the raised texture of the yarns and the layered structure of the tartan weave enabling convincing parallax effects and surface detail when applied in 3D environments.
Rendered at an impressive 8K resolution this texture delivers exceptional detail and clarity suitable for high-fidelity projects in Blender Unreal Engine and Unity. Its seamless tiling capability ensures consistent pattern repetition without visible borders making it ideal for use in digital fashion interior visualization and festive-themed environments. For practical application it is recommended to carefully adjust the UV scale to maintain the proportionality of the tartan squares and to fine-tune the Roughness map to balance between softness and fabric definition. Additionally blending Height and Normal maps can enhance the tactile realism of knitted surfaces especially when simulating close-up views of holiday sweaters or scarlet scarves.
Import the texture maps into Blender with sRGB color space for albedo/base color and Non-Color for normal, roughness, metallic, AO, height, and ORM maps. Connect normal maps through a Normal Map node, then adjust UV scale with a Mapping node so the material repeats naturally on your model.
For the full step-by-step setup, see How to Use Seamless Textures in Blender. Browse related material examples in wood, concrete, and metal.
Yes. This texture is designed as a seamless tileable PBR material, so it can repeat across large surfaces without visible borders.
You can download PNG/WEBP versions and use 1K, 2K, 4K and 8K download options when available on the page.
Yes. The download options and engine-mapped ZIP workflow are designed for Blender, Unreal Engine, Unity Standard, URP and HDRP material pipelines.
Yes. The texture is available under the AITextured free commercial license. Review the license page for redistribution and AI-training restrictions.


Build, preview, and export seamless PBR materials. Generate full map sets from a single image, inspect them in a real-time WebGL viewer, and re-package maps for Unreal, Unity, and Blender—directly in your browser.
AI text-to-texture: type a prompt and get a seamless, tileable base image ready for PBR workflows (great starting point for materials).
Create a full PBR set (Normal, Roughness, AO, Metallic, etc.) from a single image. Seamless and tiling-friendly.
Instant WebGL viewer: inspect materials on a sphere, plane, and cube. Check tiling and lighting in real time.
Re-packages maps per engine: Unreal (BaseColor + ORM), Unity (Mask/MetallicSmoothness), Blender (separate channels).
PNG ↔ JPG ↔ SVG: fast convert, SVG rasterize, embed/trace options, quality & background controls.