
Carbon Micro Weave Pattern With Carbon Matte Finish For PBR 8K Renders
Seamless texture (tileable) · PNG, WEBP, PBR ZIP. License: AITextured Free Commercial License (FCL) v1.1. Free personal and commercial use. Raw resale, standalone redistribution, mirroring/scraping, competing asset packs, and AI/ML training are not allowed without written permission. Attribution is not required, but appreciated..

| ID | seamless-3d-texture-of-carbon-filament-strands-with-carbon-glossy-finish-for-pbr-8k-realistic-renders |
|---|---|
| Category | Carbon |
| Formats | PNG, WEBP, PBR ZIP |
| Size | 1k (1024x1024px), 2k (2048x2048px), 4k (4096x4096px), 8k (8192x8192px) |
| Color | sRGB |
| Tileable | Yes |
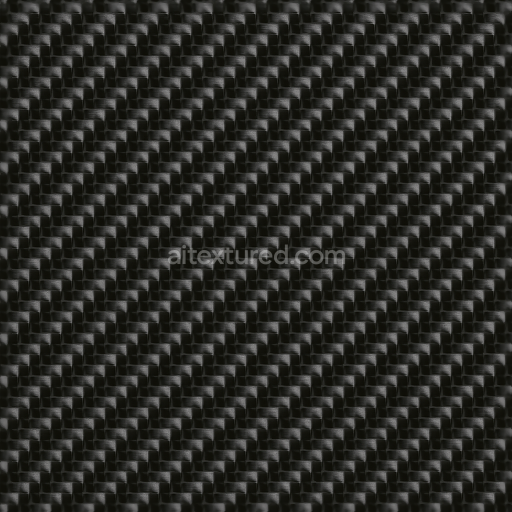
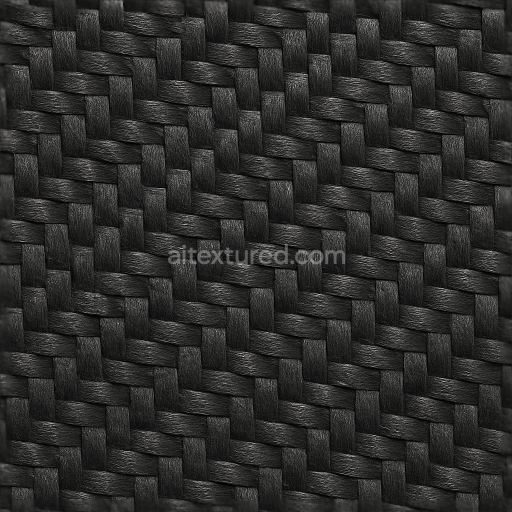
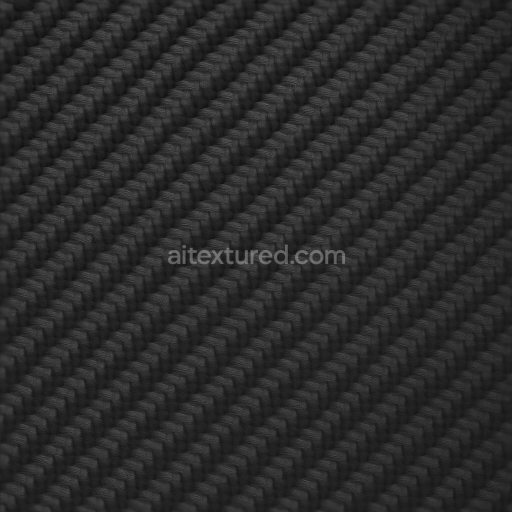
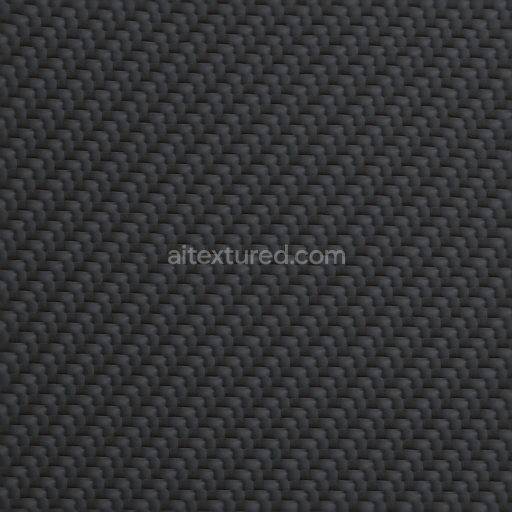
This seamless 3D texture captures the intricate arrangement of carbon filament strands forming a tightly woven, laminate pattern typical of advanced carbon composite materials. The base is composed of ultra-fine carbon fibers interlaced in a uniform grid, bound together by high-strength epoxy resin that acts as the adhesive matrix. This combination results in a structurally robust substrate exhibiting minimal porosity, optimized for mechanical durability and resistance to environmental wear. The distinctive carbon black coloration arises from the pure carbon filaments, enhanced by subtle variations in tone due to the resin’s refractive properties and the precise alignment of the fibers.
The surface finish is a polished carbon glossy coat, meticulously modeled to reflect light realistically across the texture’s microgeometry. This finish accentuates the filament detail, producing sharp highlights and smooth reflections that mimic the modern aesthetic often found in automotive and high-tech applications. The geometry simulates the slight elevation of individual strands against the resin matrix, creating a convincing depth effect through normal and height maps. The roughness channel is finely calibrated to balance between reflective gloss and subtle surface diffusion, while the metallic channel remains minimal, reflecting the non-metallic nature of the composite.
In terms of PBR mapping, the BaseColor (Albedo) channel accurately reproduces the deep carbon black hues interspersed with faint gray tones from the epoxy binder. The Normal and Height maps deliver micro-relief detail that enhances light interaction, crucial for realistic rendering at close range. Roughness values are tuned to replicate the polished finish, enabling realistic gloss without excessive shine. Ambient Occlusion adds subtle shadowing within the woven pattern, improving depth perception and volumetric realism. This texture is optimized at 8K resolution, ensuring crisp detail and smooth gradients suitable for high-end rendering workflows in Blender, Unreal Engine, and Unity.
For optimal application, it is recommended to carefully adjust the UV scale to maintain the natural appearance of the filament thickness and weave density, especially on curved surfaces. Additionally, fine-tuning the roughness parameter allows for customization between a high-gloss finish for showpieces or a more matte look for functional parts exposed to wear. Combining height or parallax mapping with the normal map can further enhance the tactile realism, providing a convincing sense of depth without excessive geometry.
Import the texture maps into Blender with sRGB color space for albedo/base color and Non-Color for normal, roughness, metallic, AO, height, and ORM maps. Connect normal maps through a Normal Map node, then adjust UV scale with a Mapping node so the material repeats naturally on your model.
For the full step-by-step setup, see How to Use Seamless Textures in Blender. Browse related material examples in wood, concrete, and metal.
Yes. This texture is designed as a seamless tileable PBR material, so it can repeat across large surfaces without visible borders.
You can download PNG/WEBP versions and use 1K, 2K, 4K and 8K download options when available on the page.
Yes. The download options and engine-mapped ZIP workflow are designed for Blender, Unreal Engine, Unity Standard, URP and HDRP material pipelines.
Yes. The texture is available under the AITextured free commercial license. Review the license page for redistribution and AI-training restrictions.


Generate, preview, and export seamless PBR materials for Blender, Unity, and Unreal Engine—directly in your browser.
AI text-to-texture: type a prompt and get a seamless, tileable base image ready for PBR workflows (great starting point for materials).
Create a full PBR set (Normal, Roughness, AO, Metallic, etc.) from a single image. Seamless and tiling-friendly.
Instant WebGL viewer: inspect materials on a sphere, plane, and cube. Check tiling and lighting in real time.
Re-packages maps per engine: Unreal (BaseColor + ORM), Unity (Mask/MetallicSmoothness), Blender (separate channels).
PNG ↔ JPG ↔ SVG: fast convert, SVG rasterize, embed/trace options, quality & background controls.