Featuring Carbon Mesh Pattern In 8K Resolution For Realistic Surfaces
Seamless texture (tileable) · PNG, WEBP, PBR ZIP. License: AITextured Free Commercial License (FCL) v1.1. Free personal and commercial use. Raw resale, standalone redistribution, mirroring/scraping, competing asset packs, and AI/ML training are not allowed without written permission. Attribution is not required, but appreciated..

| ID | seamless-3d-texture-of-woven-carbon-fiber-pbr-8k-detail-for-realistic-renders |
|---|---|
| Category | Carbon |
| Formats | PNG, WEBP, PBR ZIP |
| Size | 1k (1024x1024px), 2k (2048x2048px), 4k (4096x4096px), 8k (8192x8192px) |
| Color | sRGB |
| Tileable | Yes |
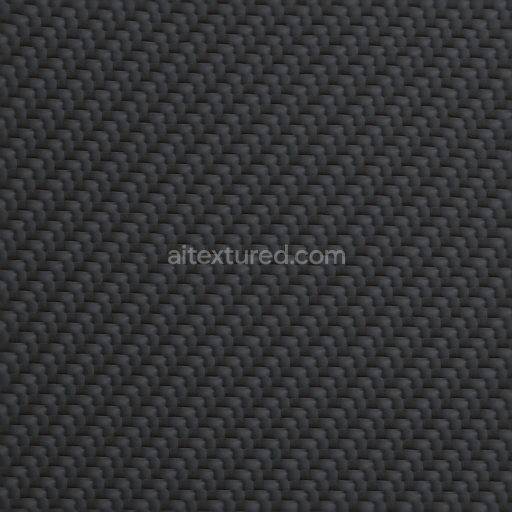
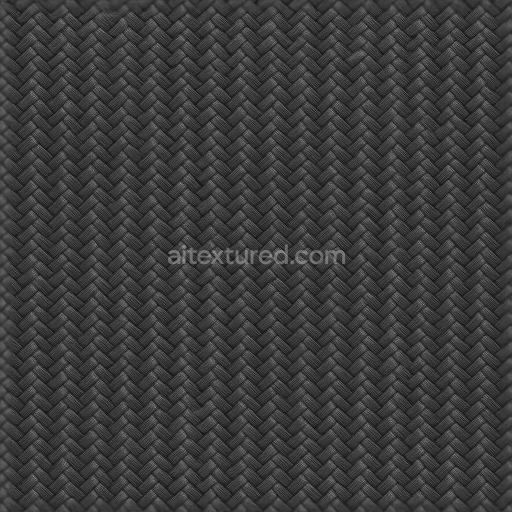
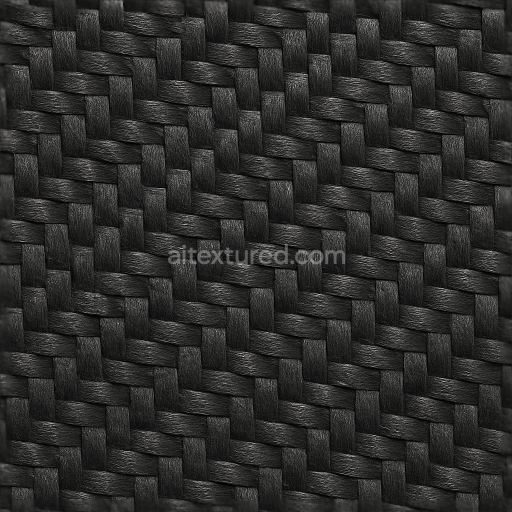
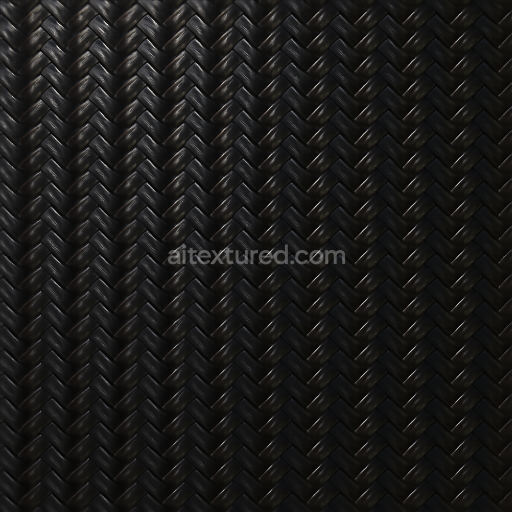
This seamless 3D texture showcases an intricately woven carbon fiber pattern, meticulously crafted to represent the complex geometry of carbon strands interlaced in a uniform weave. The base material mimics high-strength carbon fibers embedded within an epoxy resin substrate, a standard composition in advanced composites. The fibers are tightly interwoven, forming a precise twill or plain weave pattern that creates a balanced grid of raised and recessed areas, capturing the subtle relief and depth characteristic of genuine carbon weave. The texture surface exhibits a finely detailed carbon matte finish, reflecting minimal gloss to emphasize the material’s industrial and durable nature without overpowering shine.
The composition emphasizes the contrast between the dark, almost natural black carbon strands and the slightly lighter resin binder that holds the fibers together. This interplay is represented in the BaseColor (Albedo) channel with deep charcoal and graphite tones, while the Normal map accurately simulates the three-dimensional relief of the woven strands, enhancing light interaction and surface realism. The Roughness channel is calibrated to reflect the semi-matte surface typical of carbon composite panels used in automotive and modern technological applications, providing a subtle texture that diffuses light softly. The Metallic channel remains near zero due to carbon fiber’s non-metallic nature, while the Ambient Occlusion map accentuates the fiber intersections and crevices, adding depth and shadow realism. Height/Displacement maps add further dimensionality by emphasizing the raised fiber bundles and recessed resin gaps, essential for close-up renders and photorealistic surface detail.
Rendered at an 8K resolution, this texture supports high-fidelity workflows suitable for Blender, Unreal Engine, and Unity, ensuring crisp detail even on large surfaces or extreme close-ups. Its seamless design allows for flawless tiling without visible edges, making it ideal for large-scale applications such as automotive body panels, modern tech device casings, or architectural elements requiring a durable, contemporary carbon aesthetic. The texture’s natural porosity and subtle surface imperfections replicate real-world wear and environmental exposure, enhancing authenticity without demanding additional post-processing.
For practical use, it is recommended to adjust the UV scale carefully to maintain the realistic proportion of the carbon weave relative to the model size, preventing distortion or pattern repetition artifacts. Additionally, fine-tuning the Roughness channel can help simulate various finishes, from a slightly glossy automotive sheen to a more matte industrial look. Blending Height or Parallax maps with Normal maps can further enrich the tactile perception of the surface, especially in close-up renders, ensuring a convincing carbon fiber effect that responds accurately to lighting conditions.
Import the texture maps into Blender with sRGB color space for albedo/base color and Non-Color for normal, roughness, metallic, AO, height, and ORM maps. Connect normal maps through a Normal Map node, then adjust UV scale with a Mapping node so the material repeats naturally on your model.
For the full step-by-step setup, see How to Use Seamless Textures in Blender. Browse related material examples in wood, concrete, and metal.
Yes. This texture is designed as a seamless tileable PBR material, so it can repeat across large surfaces without visible borders.
You can download PNG/WEBP versions and use 1K, 2K, 4K and 8K download options when available on the page.
Yes. The download options and engine-mapped ZIP workflow are designed for Blender, Unreal Engine, Unity Standard, URP and HDRP material pipelines.
Yes. The texture is available under the AITextured free commercial license. Review the license page for redistribution and AI-training restrictions.


Generate, preview, and export seamless PBR materials for Blender, Unity, and Unreal Engine—directly in your browser.
AI text-to-texture: type a prompt and get a seamless, tileable base image ready for PBR workflows (great starting point for materials).
Create a full PBR set (Normal, Roughness, AO, Metallic, etc.) from a single image. Seamless and tiling-friendly.
Instant WebGL viewer: inspect materials on a sphere, plane, and cube. Check tiling and lighting in real time.
Re-packages maps per engine: Unreal (BaseColor + ORM), Unity (Mask/MetallicSmoothness), Blender (separate channels).
PNG ↔ JPG ↔ SVG: fast convert, SVG rasterize, embed/trace options, quality & background controls.