Carbon Layered Composite With Carbon Matte Finish For PBR 8K Renders
Seamless texture (tileable) · PNG, WEBP, PBR ZIP. License: AITextured Free Commercial License (FCL) v1.1. Free personal and commercial use. Raw resale, standalone redistribution, mirroring/scraping, competing asset packs, and AI/ML training are not allowed without written permission. Attribution is not required, but appreciated..

| ID | seamless-3d-texture-of-carbon-threads-with-carbon-high-gloss-finish-for-pbr-8k-realistic-renders |
|---|---|
| Category | Carbon |
| Formats | PNG, WEBP, PBR ZIP |
| Size | 1k (1024x1024px), 2k (2048x2048px), 4k (4096x4096px), 8k (8192x8192px) |
| Color | sRGB |
| Tileable | Yes |
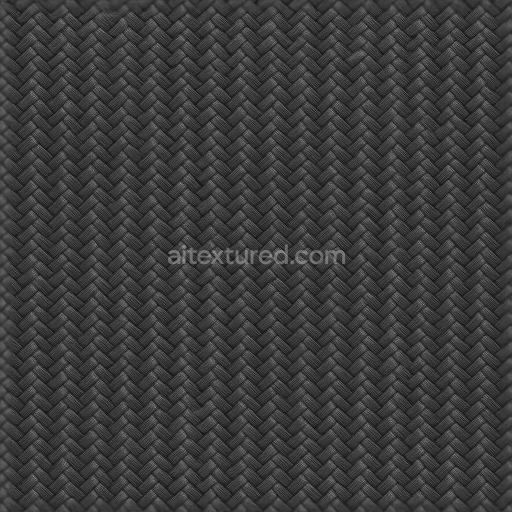
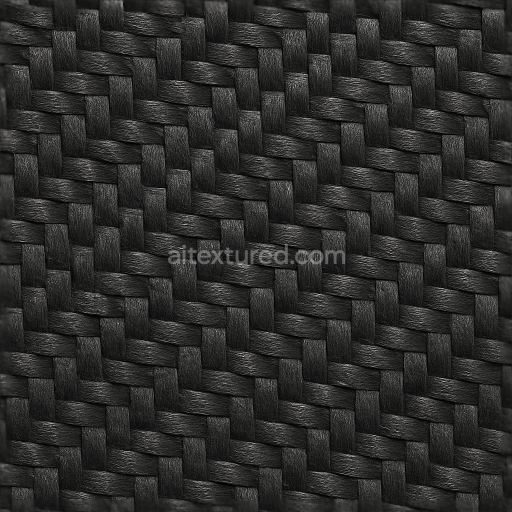
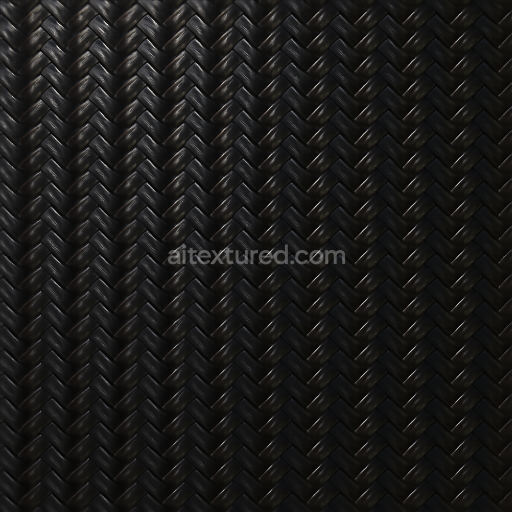
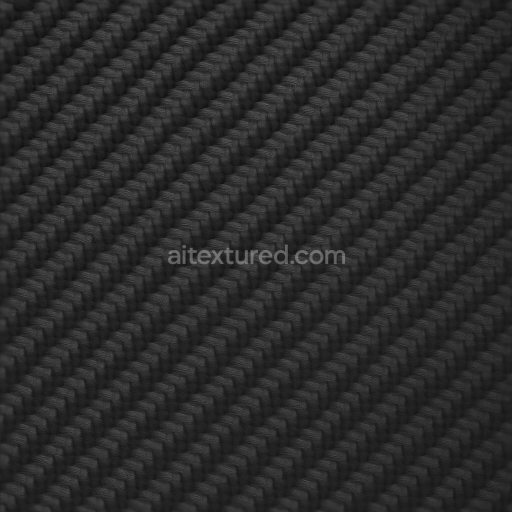
This seamless 3D texture showcases an intricate woven pattern of carbon threads, characteristic of advanced carbon fiber composites. The base material consists of tightly interlaced carbon filaments embedded within a high-strength epoxy resin matrix, forming a durable carbon composite substrate. The fine weave creates a subtle, grid-like geometric pattern that emphasizes the layered construction typical in modern automotive and aerospace-grade carbon fiber panels. The carbon threads themselves exhibit a deep black coloration with subtle variations in tone, achieved through carefully calibrated pigmentation within the fibers and resin, resulting in a rich carbon black appearance.
The surface finish is a polished, high gloss coating that enhances the reflective qualities of the carbon fiber. This glossy layer is designed to simulate a clear coat resin, providing a smooth, glass-like surface that highlights the micro-texture of the woven threads beneath. In terms of PBR (Physically Based Rendering) channels, the BaseColor (Albedo) captures the dark, nearly monochromatic black with nuanced shading from the weave. The Normal map accentuates the subtle relief of the interlaced threads, offering realistic depth and tactile detail. Roughness is finely tuned to reflect the glossy surface, with low roughness values ensuring sharp specular highlights. The Metallic channel remains minimal, as carbon fiber composites themselves are non-metallic, but subtle metallic reflections are simulated through the clearcoat. Ambient Occlusion emphasizes the recessed areas between the fibers for enhanced contrast, while the Height/Displacement map conveys the tactile elevation differences inherent in the weave.
Rendered at 8K resolution, this texture provides exceptional detail suitable for close-up visualization in high-fidelity 3D projects. It is optimized for use in prominent rendering engines such as Blender, Unreal Engine, and Unity, ensuring compatibility and realistic material responses across platforms. The seamless design guarantees flawless tiling, making it ideal for large surfaces like car hoods, electronic device casings, or architectural panels where continuous carbon fiber aesthetics are desired.
For practical application, adjusting the UV scale is recommended to balance between visible weave detail and overall surface coverage depending on the model size. Additionally, fine-tuning the roughness parameter can help simulate different finish levels from highly polished to matte carbon fiber surfaces. When integrating into scenes, blending the Height map subtly with the Normal map can enhance depth perception without causing excessive geometric displacement, preserving rendering performance while maximizing realism.
Import the texture maps into Blender with sRGB color space for albedo/base color and Non-Color for normal, roughness, metallic, AO, height, and ORM maps. Connect normal maps through a Normal Map node, then adjust UV scale with a Mapping node so the material repeats naturally on your model.
For the full step-by-step setup, see How to Use Seamless Textures in Blender. Browse related material examples in wood, concrete, and metal.
Yes. This texture is designed as a seamless tileable PBR material, so it can repeat across large surfaces without visible borders.
You can download PNG/WEBP versions and use 1K, 2K, 4K and 8K download options when available on the page.
Yes. The download options and engine-mapped ZIP workflow are designed for Blender, Unreal Engine, Unity Standard, URP and HDRP material pipelines.
Yes. The texture is available under the AITextured free commercial license. Review the license page for redistribution and AI-training restrictions.


Generate, preview, and export seamless PBR materials for Blender, Unity, and Unreal Engine—directly in your browser.
AI text-to-texture: type a prompt and get a seamless, tileable base image ready for PBR workflows (great starting point for materials).
Create a full PBR set (Normal, Roughness, AO, Metallic, etc.) from a single image. Seamless and tiling-friendly.
Instant WebGL viewer: inspect materials on a sphere, plane, and cube. Check tiling and lighting in real time.
Re-packages maps per engine: Unreal (BaseColor + ORM), Unity (Mask/MetallicSmoothness), Blender (separate channels).
PNG ↔ JPG ↔ SVG: fast convert, SVG rasterize, embed/trace options, quality & background controls.