This seamless granite texture seamless high resolution up to 8ktexture offers an exceptionally detailed and realistic representation of natural granite stone, capturing the intricate mineralogical composition that defines its unique appearance. At its core, the texture portrays a durable base substrate formed by tightly interlocking crystals of quartz, feldspar, and mica, which together create a dense, low-porosity surface characteristic of authentic granite. The polished finish accentuates the stone’s natural colorants—subtle soft greys, whites, and occasional flecks of black and pink—originating from trace oxide layers and mineral impurities embedded within the crystalline matrix. These compositional and surface qualities manifest clearly across the physically based rendering (PBR) channels: the BaseColor or Albedo map reveals the rich, natural color palette; the Normal map captures fine grain orientation and micro-fissures; the Roughness map balances the polished sheen with slightly matte areas typical of granite’s heterogeneous surface; while the Height or Displacement map adds subtle depth and texture without exaggerating wear or weathering. Complementary Metallic and Ambient Occlusion maps enhance the overall realism by simulating nuanced light interactions and shadowing within the stone’s granular structure.
Designed as a tileable seamless granite texture seamless high resolution up to 8k, this material flawlessly scales across extensive surfaces without visible seams or distortion, making it ideal for a wide range of projects including architectural visualization, game environments, product mockups, and interior staging. Its advanced AI-driven production pipeline ensures consistent micro-detail and structural accuracy, delivering a highly convincing stone texture optimized for physically based rendering workflows. The texture files are fully compatible with major 3D engines such as Blender, Unreal Engine, and Unity, allowing straightforward integration with minimal setup. Available in versatile high-quality formats like PNG and WEBP, this seamless granite texture maintains crisp detail and color fidelity even at the highest 8K resolutions, providing flexibility for both close-up scrutiny and expansive environmental scenes.
To maximize the realism of this seamless granite texture seamless high resolution up to 8k in your projects, it is recommended to adjust the roughness and normal map intensities based on your scene’s lighting conditions and desired surface reflectivity. Fine-tuning the roughness map helps replicate the subtle interplay between polished and matte areas characteristic of granite, while carefully modulating the normal map enhances perceived surface depth and grain orientation without introducing unnatural artifacts. Additionally, manipulating the UV scale allows precise control over the texture’s repetition and granularity, ensuring the stone pattern harmonizes with the scale of your model or environment. Incorporating this seamless granite texture high resolution up to 8k into your material library empowers faster iteration and significantly elevates the visual fidelity of stone surfaces across diverse digital projects, supported by a real-time 3D preview that facilitates accurate assessment before final application.
The AI-generated seamless granite texture offers a seamless high resolution up to 8k, providing realistic stone textures with precise PBR appearance for advanced material composition.
How to Use These Seamless PBR Textures in Blender
This guide shows how to connect a full PBR texture set to Principled BSDF in Blender (Cycles or Eevee). Works with any of our seamless textures free download, including PBR PNG materials for Blender / Unreal / Unity.
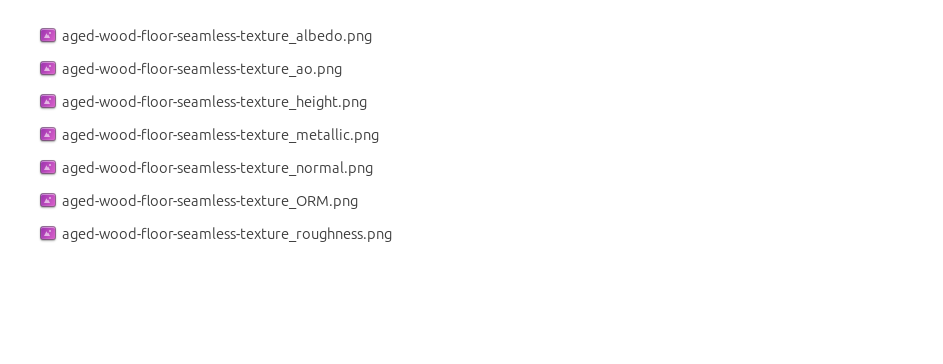
What’s inside the download
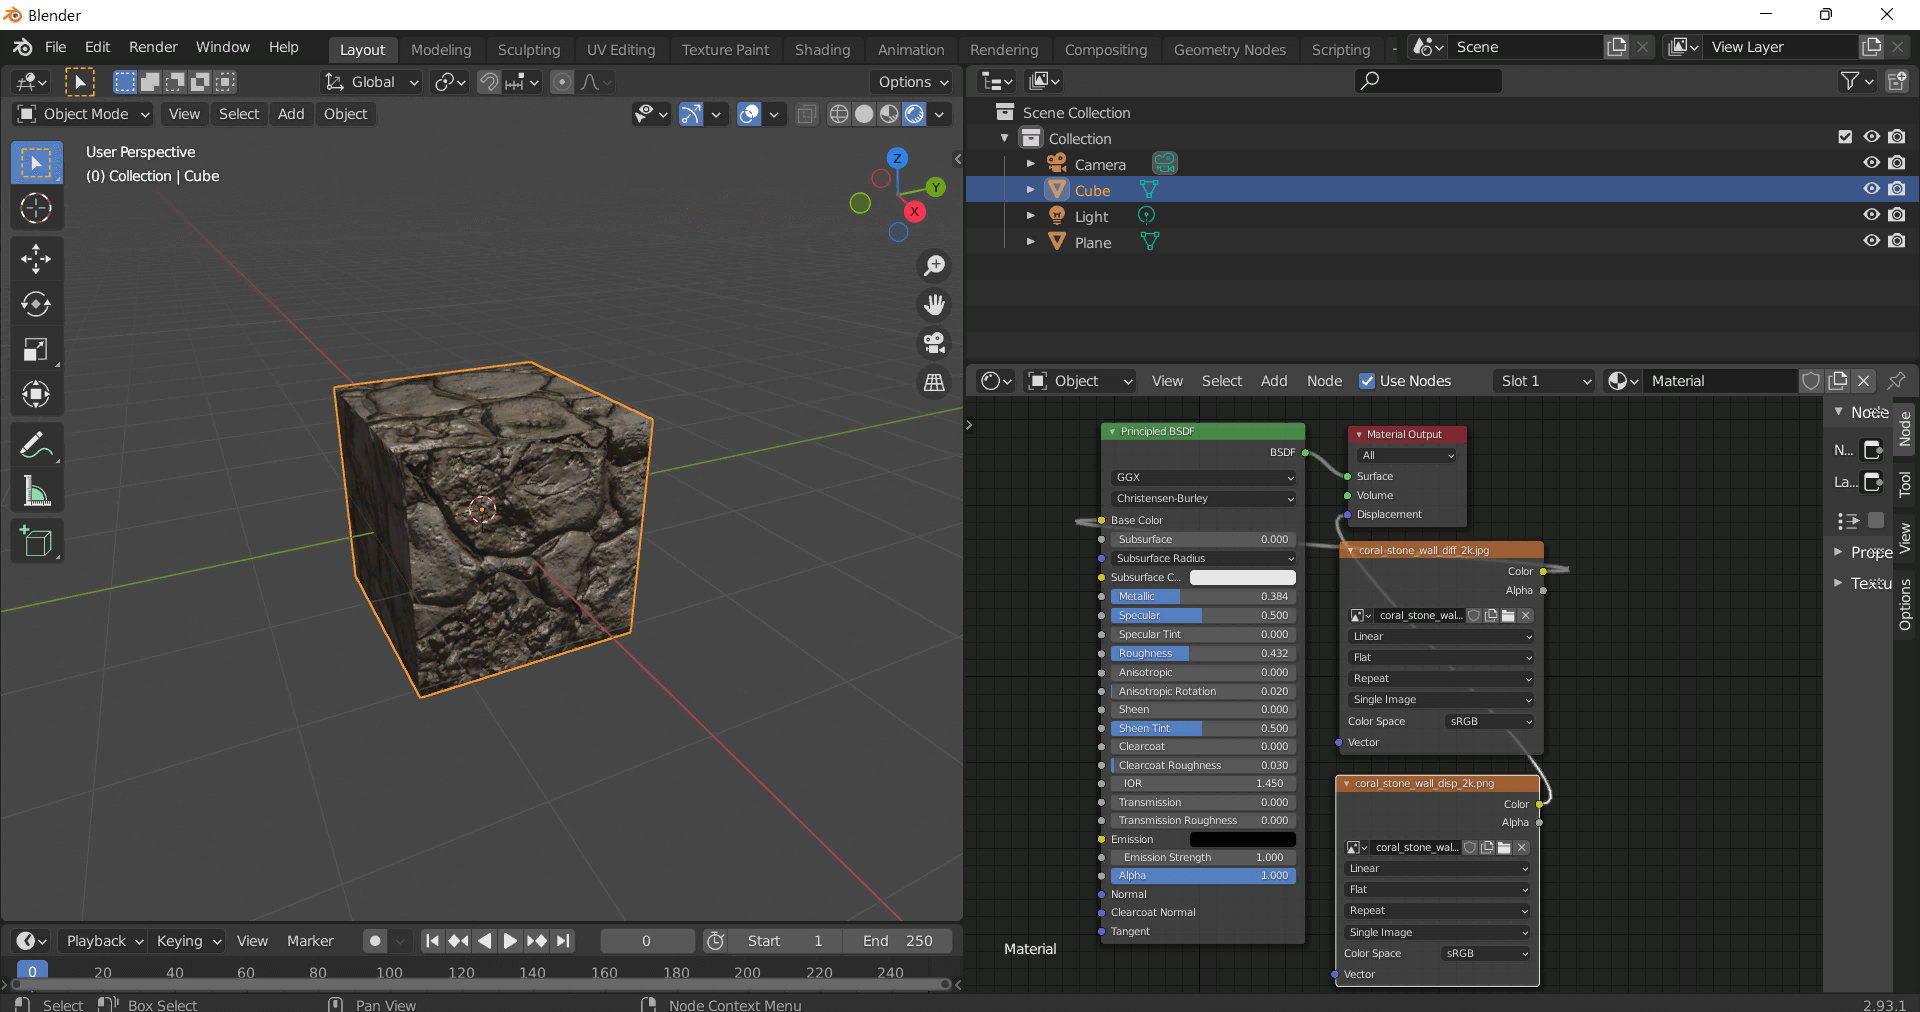
*_albedo.png — Base Color (sRGB)*_normal.png — Normal map (Non-Color)*_roughness.png — Roughness (Non-Color)*_metallic.png — Metallic (Non-Color)*_ao.png — Ambient Occlusion (Non-Color)*_height.png — Height / Displacement (Non-Color)*_ORM.png — Packed map (R=AO, G=Roughness, B=Metallic, Non-Color)
Quick start (Node Wrangler, 30 seconds)
- Enable the addon: Edit → Preferences → Add-ons → Node Wrangler.
- Create a material and select the Principled BSDF node.
- Press Ctrl + Shift + T and select the maps
albedo, normal, roughness, metallic (skip height and ORM for now) → Open.
The addon wires Base Color, Normal (with a Normal Map node), Roughness, and Metallic automatically.
- Add AO and Height using the “Manual wiring” steps below (5 and 6).
Manual wiring (full control)
- Create a material (Material Properties → New) and open the Shader Editor.
- Add an Image Texture node for each map. Set Color Space:
- Albedo → sRGB
- AO, Roughness, Metallic, Normal, Height, ORM → Non-Color
- Connect to Principled BSDF:
albedo → Base Colorroughness → Roughnessmetallic → Metallic (for wood this often stays near 0)normal → Normal Map node (Type: Tangent Space) → Normal of Principled.
If details look “inverted”, enable Invert Y on the Normal Map node.
- Ambient Occlusion (AO):
- Add a MixRGB (or Mix Color) node in mode Multiply.
- Input A =
albedo, Input B = ao, Factor = 1.0.
- Output of Mix → Base Color of Principled (replaces the direct albedo connection).
- Height / Displacement:
Cycles — true displacement
- Material Properties → Settings → Displacement: Displacement and Bump.
- Add a Displacement node: connect
height → Height, set Midlevel = 0.5, Scale = 0.02–0.08 (tune to taste).
- Output of Displacement → Material Output → Displacement.
- Add geometry density (e.g., Subdivision Surface) so displacement has polygons to work with.
Eevee (or lightweight Cycles) — bump only
- Add a Bump node:
height → Height.
- Set Strength = 0.2–0.5, Distance = 0.05–0.1, and connect Normal output to Principled’s Normal.
Using the packed ORM texture (optional)
Instead of separate AO/Roughness/Metallic maps you can use the single *_ORM.png:
- Add one Image Texture (Non-Color) → Separate RGB (or Separate Color).
- R (red) → AO (use it in the Multiply node with albedo as above).
- G (green) → Roughness of Principled.
- B (blue) → Metallic of Principled.
UVs & seamless tiling
- These textures are seamless. If your mesh has no UVs, go to UV Editing → Smart UV Project.
- For scale/repeat, add Texture Coordinate (UV) → Mapping and plug it into all texture nodes.
Increase Mapping → Scale (e.g., 2/2/2) to tile more densely.
Recommended starter values
- Normal Map Strength: 0.5–1.0
- Bump Strength: ~0.3
- Displacement Scale (Cycles): ~0.03
Common pitfalls
- Wrong Color Space (normals/roughness/etc. must be Non-Color).
- “Inverted” details → enable Invert Y on the Normal Map node.
- Over-strong relief → lower Displacement Scale or Bump Strength.
Example: Download Wood Textures and instantly apply parquet or rustic planks inside Blender for architectural visualization.
To add the downloaded texture, go to Add — Texture — Image Texture.
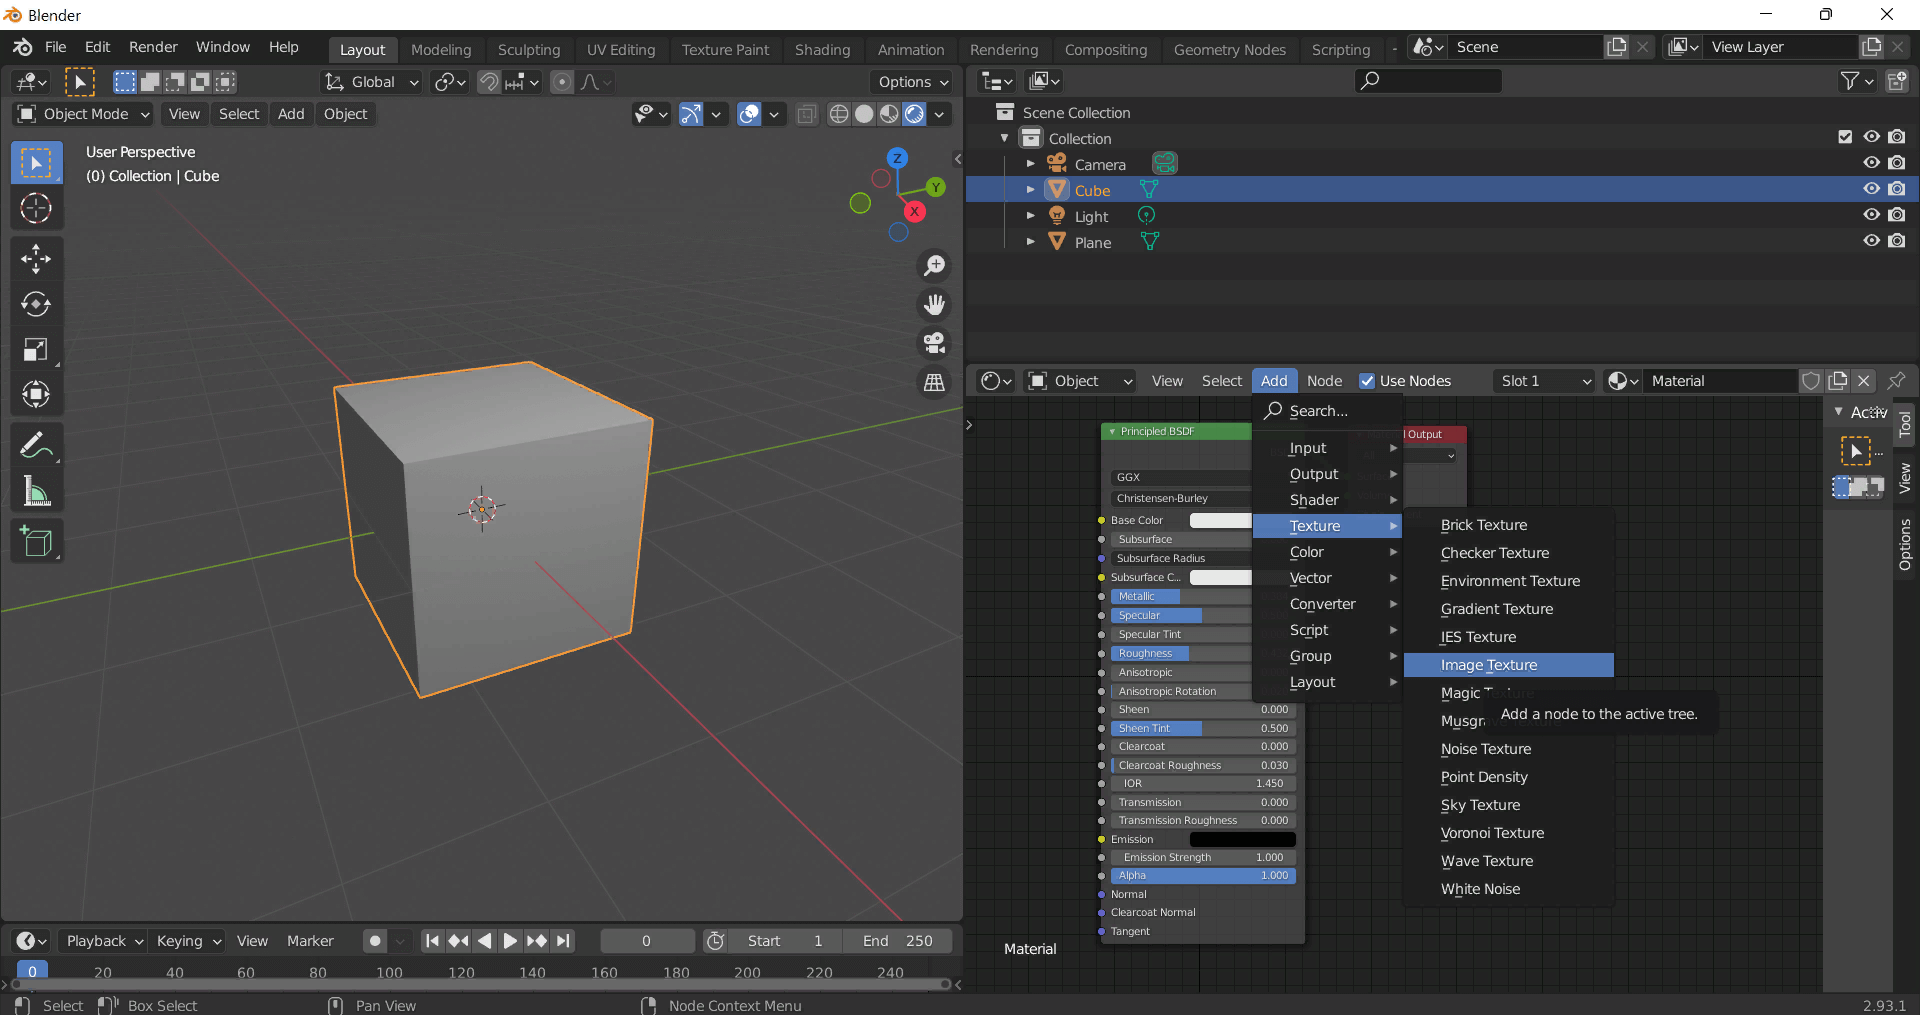
Add a node and click the Open button.
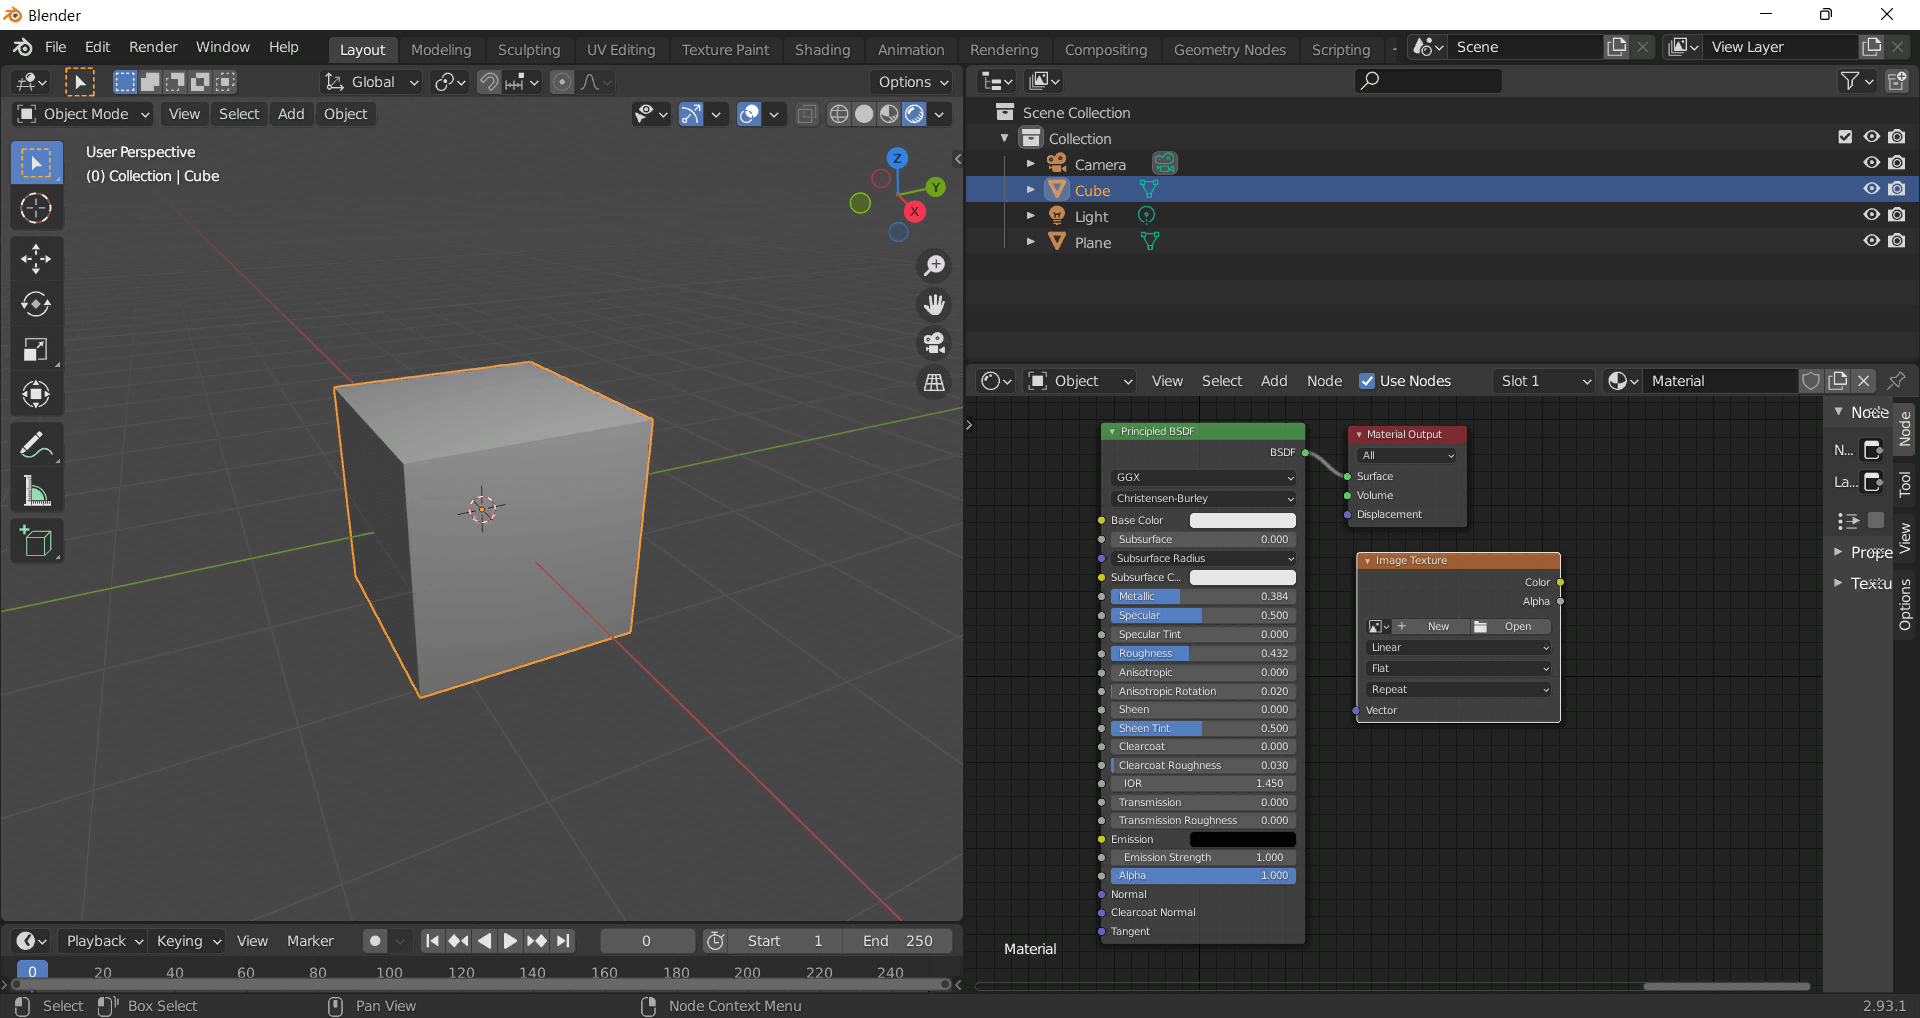
Select the required texture on your hard drive and connect Color to Base Color.