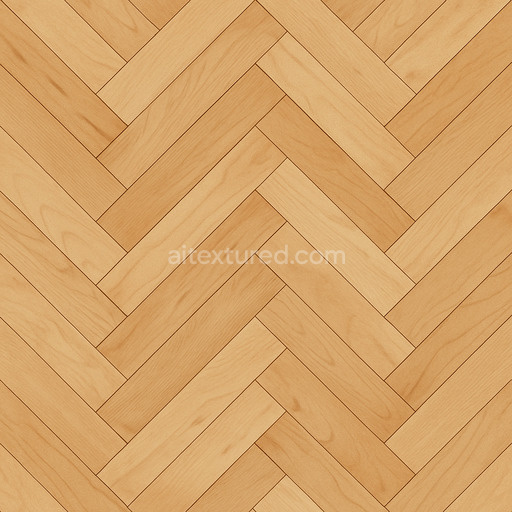
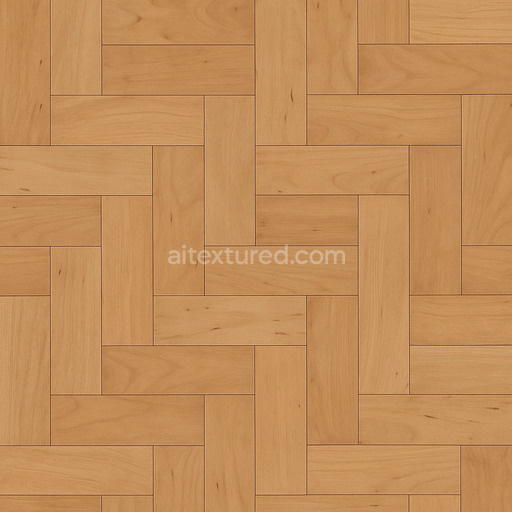
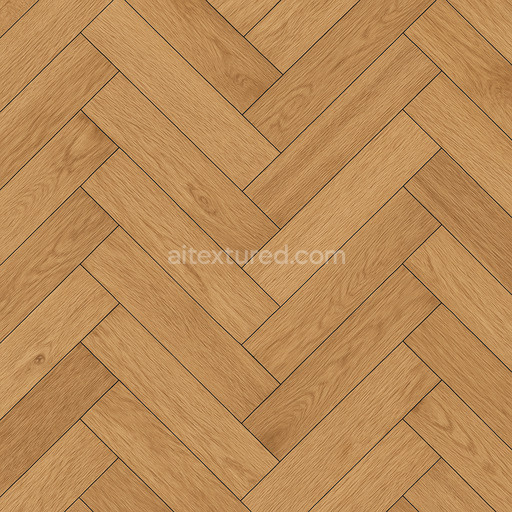
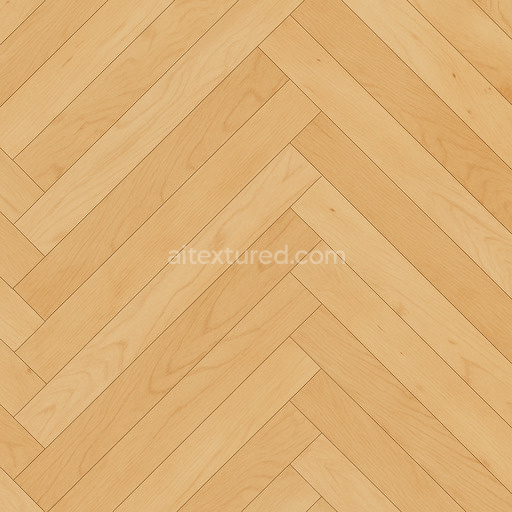
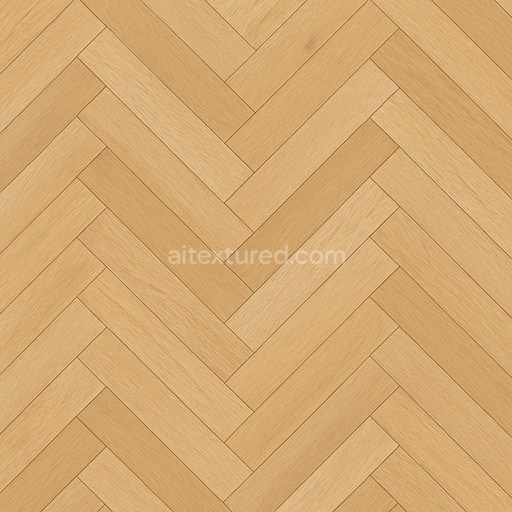
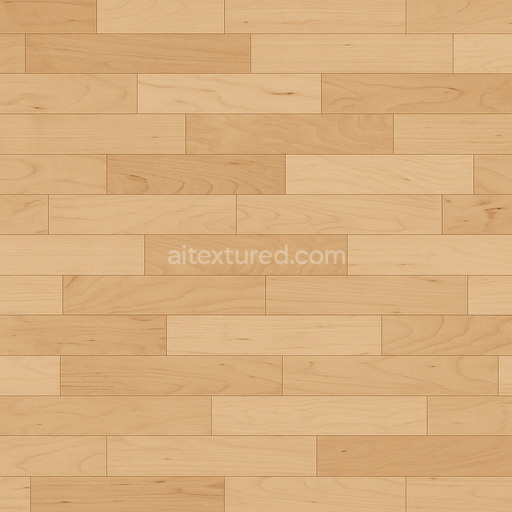
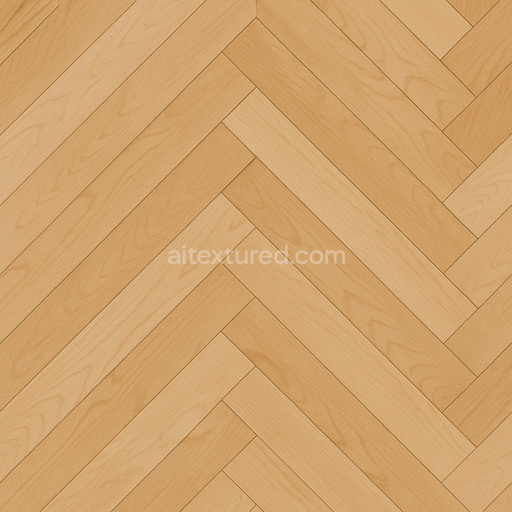
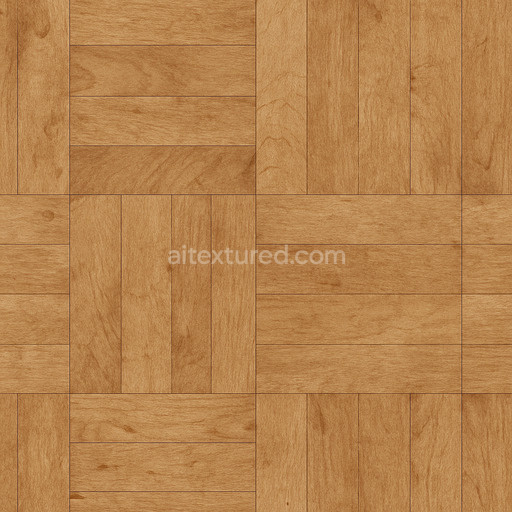
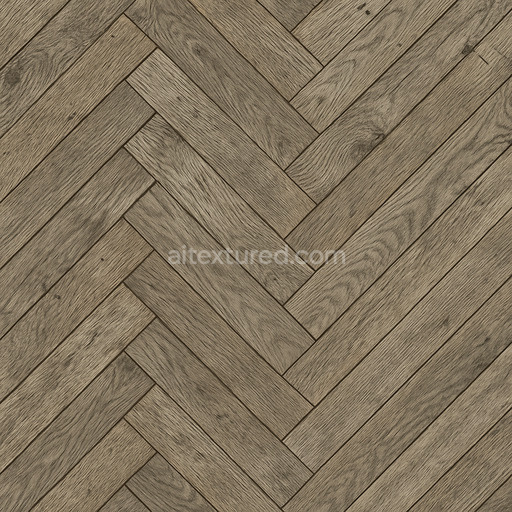
Patterned Maple Parquet Seamless Texture
Seamless texture (tileable) · PNG, WEBP, PBR ZIP. License: AITextured Free Commercial License (FCL) v1.1. Free personal and commercial use. Raw resale, standalone redistribution, mirroring/scraping, competing asset packs, and AI/ML training are not allowed without written permission. Attribution is not required, but appreciated..

| ID | detailed-maple-parquet-texture-seamless |
|---|---|
| Category | Parquet |
| Formats | PNG, WEBP, PBR ZIP |
| Size | 1k (1024x1024px), 2k (2048x2048px), 4k (4096x4096px), 8k (8192x8192px) |
| Color | sRGB |
| Tileable | Yes |
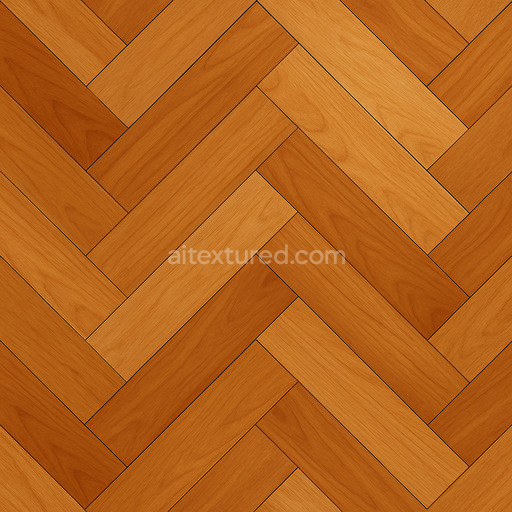
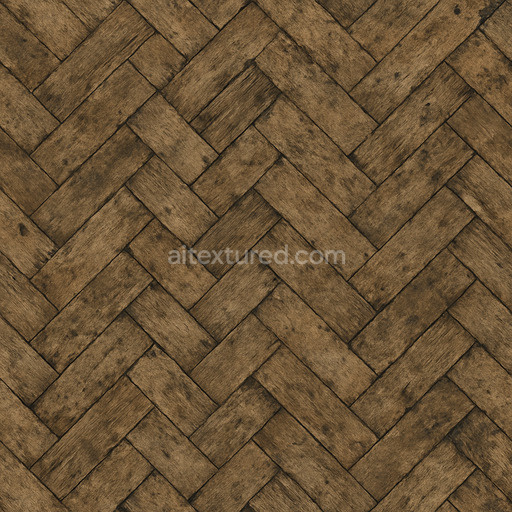
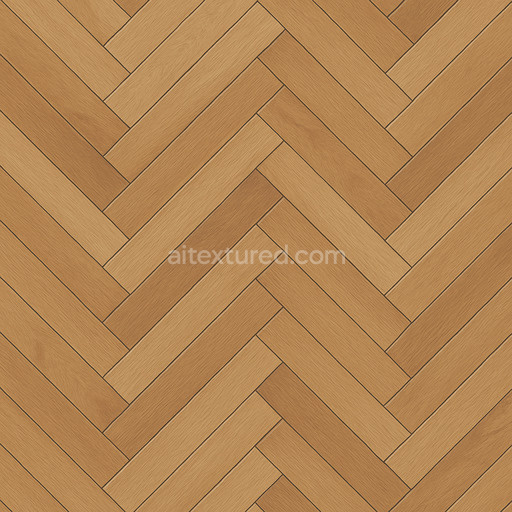
This detailed maple parquet texture seamless high resolution up to 8K is an expertly crafted generated material that captures the authentic essence of premium maple wood flooring. The base substrate is natural hardwood characterized by fine grain orientation and subtle variations in fiber alignment that create organic flowing patterns typical of maple. The texture simulates a smooth polished finish with a slight satin sheen reflecting the carefully applied surface treatments used in real parquet floors. The realistic colorants include warm creamy tones with soft amber hues achieved by layering pigments and natural wood dyes that highlight the subtle variations and knots within the grain. Adhesives and binders are implied through the tight uniform joints between parquet blocks suggesting a solid durable assembly with minimal porosity or weathering effects ideal for pristine indoor environments.
In terms of PBR channel mapping the BaseColor/Albedo channel exhibits the rich warm coloration and fine grain details that define maple wood. The Normal map emphasizes the micro-details of the wood grain and the slight bevels along parquet edges adding depth and tactile realism. Roughness values are finely tuned to reflect a moderately smooth surface with just enough variation to suggest natural wear and subtle surface imperfections without appearing overly glossy. The Metallic channel is nearly zero consistent with organic wood materials while Ambient Occlusion accentuates the subtle shadows where parquet pieces meet enhancing the sense of depth and dimensionality. The Height or Displacement map captures the gentle elevation changes between individual parquet tiles contributing to a convincing surface breakup that enhances realism in 3D scenes.
This tileable detailed maple parquet texture seamless high resolution up to 8K is designed to scale elegantly across large surfaces without visible seams making it ideal for architectural visualization game environments product mockups and interior staging. It integrates flawlessly into Blender Unreal Engine and Unity workflows allowing artists and developers to accelerate their projects with predictable high-quality results. To optimize appearance consider adjusting the UV scale to match your scene’s dimensions and combine the texture with a subtle ambient occlusion pass and a light normal map overlay. Additionally tuning roughness can help achieve the perfect balance between polished and natural wood surfaces enhancing realism without oversharpening the details.
This PBR material offers a detailed maple parquet texture seamless high resolution up to 8K providing parquet textures with a realistic PBR appearance and a 3D preview for precise material composition analysis.
Import the texture maps into Blender with sRGB color space for albedo/base color and Non-Color for normal, roughness, metallic, AO, height, and ORM maps. Connect normal maps through a Normal Map node, then adjust UV scale with a Mapping node so the material repeats naturally on your model.
For the full step-by-step setup, see How to Use Seamless Textures in Blender. Browse related material examples in wood, concrete, and metal.
Yes. This texture is designed as a seamless tileable PBR material, so it can repeat across large surfaces without visible borders.
You can download PNG/WEBP versions and use 1K, 2K, 4K and 8K download options when available on the page.
Yes. The download options and engine-mapped ZIP workflow are designed for Blender, Unreal Engine, Unity Standard, URP and HDRP material pipelines.
Yes. The texture is available under the AITextured free commercial license. Review the license page for redistribution and AI-training restrictions.

Generate, preview, and export seamless PBR materials for Blender, Unity, and Unreal Engine—directly in your browser.
AI text-to-texture: type a prompt and get a seamless, tileable base image ready for PBR workflows (great starting point for materials).
Create a full PBR set (Normal, Roughness, AO, Metallic, etc.) from a single image. Seamless and tiling-friendly.
Instant WebGL viewer: inspect materials on a sphere, plane, and cube. Check tiling and lighting in real time.
Re-packages maps per engine: Unreal (BaseColor + ORM), Unity (Mask/MetallicSmoothness), Blender (separate channels).
PNG ↔ JPG ↔ SVG: fast convert, SVG rasterize, embed/trace options, quality & background controls.