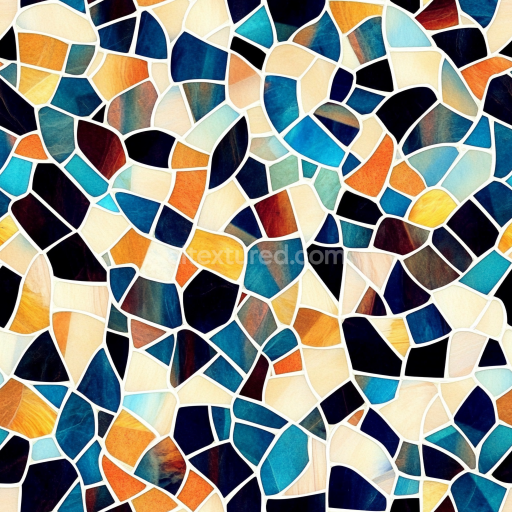
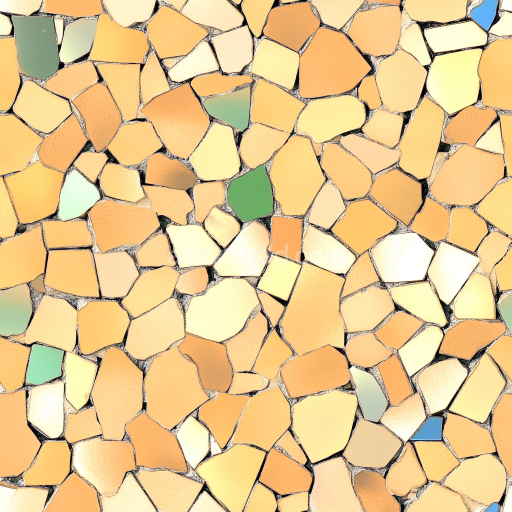
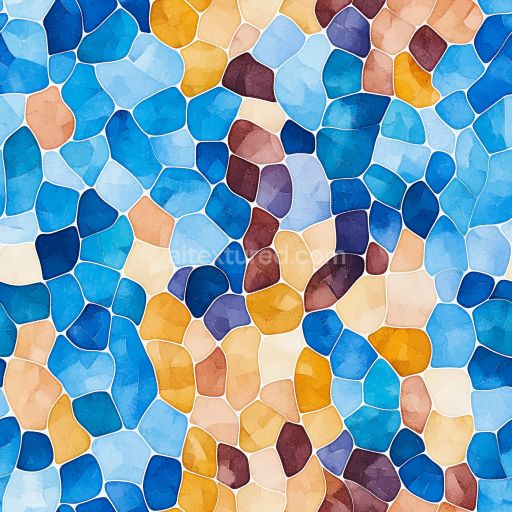
Mosaic PBR Texture of Multicolor Stone Chip Pattern with Mixed Blue and Orange Hues
Seamless texture (tileable) · PNG, WEBP, PBR ZIP. License: AITextured Free Commercial License (FCL) v1.1. Free personal and commercial use. Raw resale, standalone redistribution, mirroring/scraping, competing asset packs, and AI/ML training are not allowed without written permission. Attribution is not required, but appreciated..

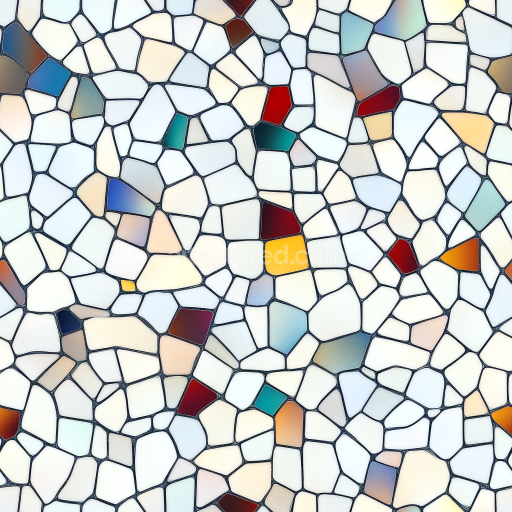
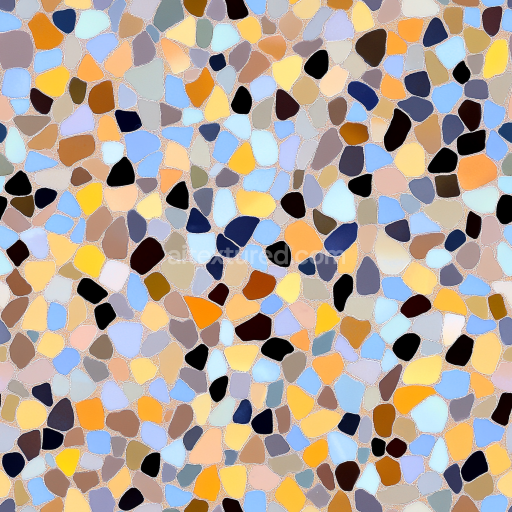
| ID | seamless-3d-texture-pbr-8k-onyx-pieces-mosaic-with-neutral-hues-and-polished-stone-finish |
|---|---|
| Category | Mosaic |
| Formats | PNG, WEBP, PBR ZIP |
| Size | 1k (1024x1024px), 2k (2048x2048px), 4k (4096x4096px), 8k (8192x8192px) |
| Color | sRGB |
| Tileable | Yes |
This seamless 3D texture features a meticulously crafted mosaic composed of irregular onyx stone pieces, arranged in a natural yet refined pattern that emphasizes organic geometry rather than uniform shapes. The base material is high-quality onyx, known for its translucent qualities and subtle veining, presented here in a range of neutral hues including soft creams, warm beiges, and muted grays. Each onyx fragment is embedded within fine tile grout that simulates the traditional adhesive binder, providing structural cohesion while maintaining a realistic depth and spatial separation. The grout’s subtle roughness and slightly darker tone contrast gently with the polished stone surfaces, enhancing the perception of individual pieces in the mosaic without overwhelming the overall harmony of the design.
The texture’s form captures the irregularity of natural stone tessellation rather than rigid geometric tiling, with each piece exhibiting unique contours and surface relief that contribute to a dynamic tactile impression. The polished stone finish delivers a glossy, almost reflective surface appearance, which is faithfully represented in the PBR workflow through a low roughness map value and carefully calibrated specular highlights. The BaseColor (Albedo) channel accurately preserves the onyx’s translucent color gradations and natural veining patterns, while the Normal and Height maps emphasize subtle surface undulations and the grout lines’ recessed structure. Ambient Occlusion enhances the small crevices and shadowed areas between the stone fragments, providing depth and dimensionality essential for photorealistic rendering in engines like Blender, Unreal Engine, and Unity.
In terms of material composition, the onyx pieces simulate a natural semi-precious stone substrate, exhibiting low porosity with a dense, crystalline structure. The grout acts as a synthetic binder, reminiscent of cementitious or polymer-based adhesives used in real-world mosaic installations, offering slight textural roughness that contrasts with the stone’s smoothness. No metallic elements are present, and the Metallic channel remains neutral, focusing solely on the interplay between light and the polished mineral surfaces. This texture is optimized at an 8K resolution, ensuring high fidelity in close-up views and allowing flexible usage across diverse scales without visible pixelation or tiling artifacts.
For practical application, adjusting the UV scale allows designers to control the mosaic’s visual density, making it suitable either for expansive architectural surfaces or detailed decorative accents. Slight tuning of the roughness map can simulate varying degrees of polish—from high gloss to a more matte finish—depending on environmental context or stylistic preference. Additionally, blending the Height and Normal maps can enhance parallax effects in real-time engines, adding convincing depth to the mosaic’s surface relief without excessive computational cost. This texture is well-suited for luxury interior visualizations, digital art projects, and any scenario requiring a premium, photorealistic stone mosaic with nuanced material complexity and naturalistic form.
Import the texture maps into Blender with sRGB color space for albedo/base color and Non-Color for normal, roughness, metallic, AO, height, and ORM maps. Connect normal maps through a Normal Map node, then adjust UV scale with a Mapping node so the material repeats naturally on your model.
For the full step-by-step setup, see How to Use Seamless Textures in Blender. Browse related material examples in wood, concrete, and metal.
Yes. This texture is designed as a seamless tileable PBR material, so it can repeat across large surfaces without visible borders.
You can download PNG/WEBP versions and use 1K, 2K, 4K and 8K download options when available on the page.
Yes. The download options and engine-mapped ZIP workflow are designed for Blender, Unreal Engine, Unity Standard, URP and HDRP material pipelines.
Yes. The texture is available under the AITextured free commercial license. Review the license page for redistribution and AI-training restrictions.


Build, preview, and export seamless PBR materials. Generate full map sets from a single image, inspect them in a real-time WebGL viewer, and re-package maps for Unreal, Unity, and Blender—directly in your browser.
AI text-to-texture: type a prompt and get a seamless, tileable base image ready for PBR workflows (great starting point for materials).
Create a full PBR set (Normal, Roughness, AO, Metallic, etc.) from a single image. Seamless and tiling-friendly.
Instant WebGL viewer: inspect materials on a sphere, plane, and cube. Check tiling and lighting in real time.
Re-packages maps per engine: Unreal (BaseColor + ORM), Unity (Mask/MetallicSmoothness), Blender (separate channels).
PNG ↔ JPG ↔ SVG: fast convert, SVG rasterize, embed/trace options, quality & background controls.