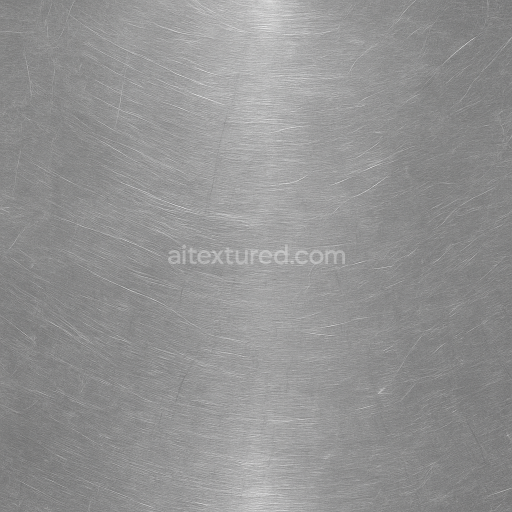
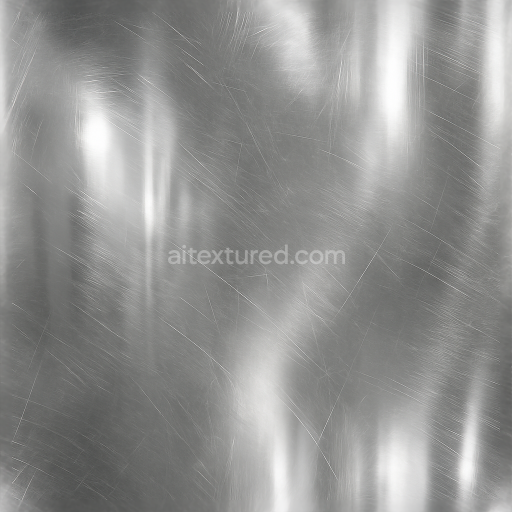
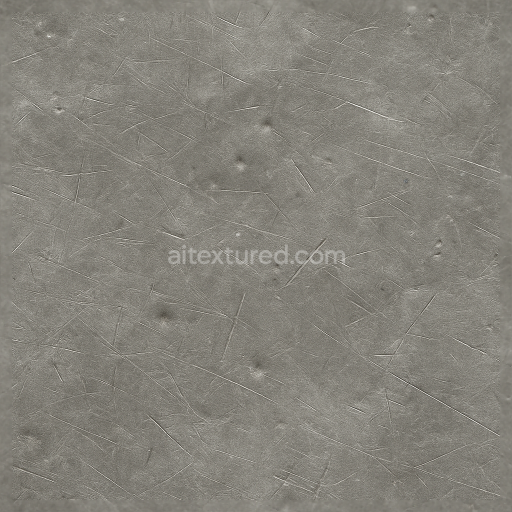
Seamless Shiny Metal 3D Texture PBR 8K Stainless Steel Surface With Metal Polish And Meta…
Seamless texture (tileable) · PNG, WEBP, PBR ZIP. License: AITextured Free Commercial License (FCL) v1.1. Free personal and commercial use. Raw resale, standalone redistribution, mirroring/scraping, competing asset packs, and AI/ML training are not allowed without written permission. Attribution is not required, but appreciated..

| ID | seamless-shiny-metal-3d-texture-pbr-8k-perforated-metal-surface-with-metal-mesh-and-metal-holes |
|---|---|
| Category | Shiny metal |
| Formats | PNG, WEBP, PBR ZIP |
| Size | 1k (1024x1024px), 2k (2048x2048px), 4k (4096x4096px), 8k (8192x8192px) |
| Color | sRGB |
| Tileable | Yes |
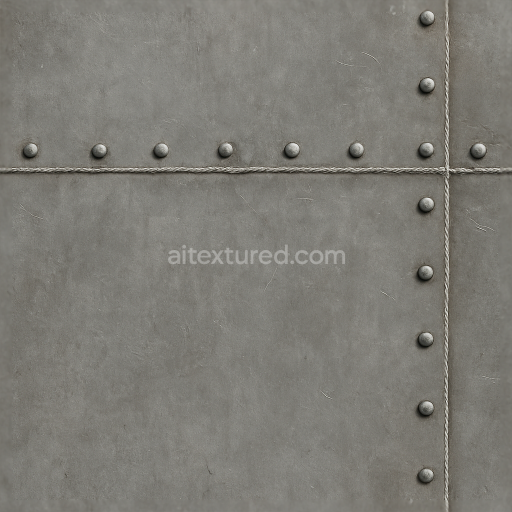
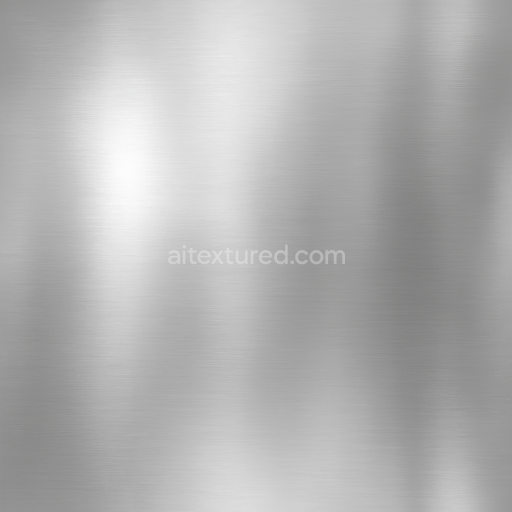
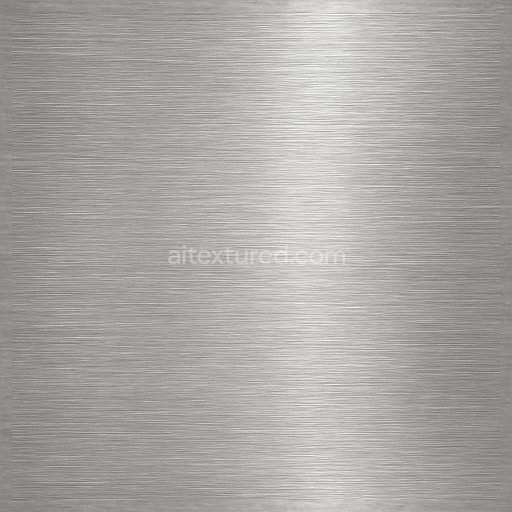
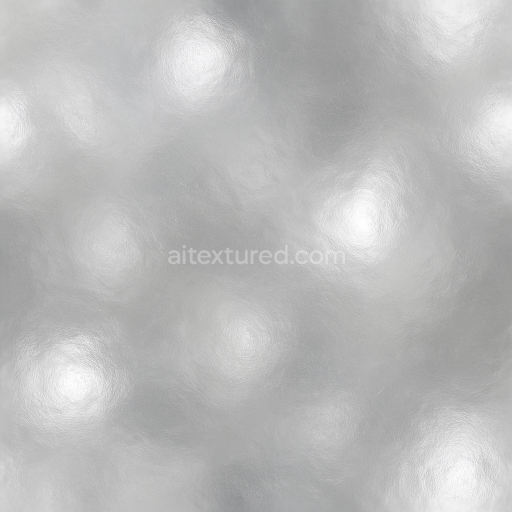
This seamless 8K PBR texture presents a highly detailed perforated metal surface characterized by a precise geometric pattern of evenly spaced circular metal holes arranged in a uniform metal mesh layout. The base material is a high-grade stainless steel sheet, known for its durability and resistance to corrosion, commonly used in industrial and architectural applications. The metal substrate exhibits a polished finish with subtle brushing marks, lending a slightly reflective yet textured surface that captures light realistically. This metal plating is engineered with a thin oxide layer, contributing to a neutral silver-gray hue visible in the BaseColor (Albedo) channel. The perforations create a repetitive lattice structure, enhancing air flow and light transmission, while the metal mesh pattern offers structural rigidity and visual complexity.
From a material composition standpoint, the texture simulates a solid metal sheet reinforced by an underlying mesh framework, with metal holes carefully punched to precise tolerances. The absence of binders or adhesives is notable, as the integrity of the metal surface relies solely on metallurgical bonding and mechanical perforation. The surface finish combines a polished sheen with subtle abrasions and micro-scratches, which are accurately represented in the Roughness and Normal maps to achieve realistic reflections and tactile depth. The Ambient Occlusion channel emphasizes the shadowing around each perforation, enhancing the perception of depth and separation between the mesh elements. Height and Displacement maps recreate the slight embossing around the edges of the holes, simulating the deformed metal caused by the perforation process.
Designed for advanced workflows, this texture is fully compatible with Blender, Unreal Engine, and Unity, supporting physically based rendering pipelines to ensure consistent visual fidelity across platforms. The 8K resolution provides exceptional detail, allowing close-up inspection without pixelation, making it suitable for high-end architectural visualization, product design, and detailed 3D modeling scenarios. The metallic channel is calibrated to replicate the reflective properties of stainless steel accurately, while the combination of maps allows artists to fine-tune material responses under varying lighting and environmental conditions.
For optimal use, it is recommended to carefully adjust the UV scale to maintain the correct size of the perforations relative to the model, preserving realism. Additionally, tweaking the roughness values can help simulate different states of metal wear—from freshly polished to slightly weathered finishes. When integrating height or displacement maps, blending them subtly with normal maps can improve the perception of depth without introducing harsh geometry distortions, especially useful for real-time rendering environments where performance and visual quality must be balanced.
Import the texture maps into Blender with sRGB color space for albedo/base color and Non-Color for normal, roughness, metallic, AO, height, and ORM maps. Connect normal maps through a Normal Map node, then adjust UV scale with a Mapping node so the material repeats naturally on your model.
For the full step-by-step setup, see How to Use Seamless Textures in Blender. Browse related material examples in wood, concrete, and metal.
Yes. This texture is designed as a seamless tileable PBR material, so it can repeat across large surfaces without visible borders.
You can download PNG/WEBP versions and use 1K, 2K, 4K and 8K download options when available on the page.
Yes. The download options and engine-mapped ZIP workflow are designed for Blender, Unreal Engine, Unity Standard, URP and HDRP material pipelines.
Yes. The texture is available under the AITextured free commercial license. Review the license page for redistribution and AI-training restrictions.


Build, preview, and export seamless PBR materials. Generate full map sets from a single image, inspect them in a real-time WebGL viewer, and re-package maps for Unreal, Unity, and Blender—directly in your browser.
AI text-to-texture: type a prompt and get a seamless, tileable base image ready for PBR workflows (great starting point for materials).
Create a full PBR set (Normal, Roughness, AO, Metallic, etc.) from a single image. Seamless and tiling-friendly.
Instant WebGL viewer: inspect materials on a sphere, plane, and cube. Check tiling and lighting in real time.
Re-packages maps per engine: Unreal (BaseColor + ORM), Unity (Mask/MetallicSmoothness), Blender (separate channels).
PNG ↔ JPG ↔ SVG: fast convert, SVG rasterize, embed/trace options, quality & background controls.