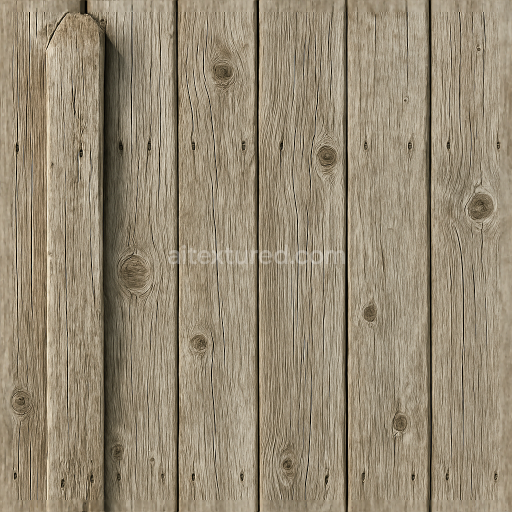
Seamless 8K 3D Texture PBR Rough Wood Fence Post With Knots And Splinters In Aged Wood Fi…
Seamless texture (tileable) · PNG, WEBP, PBR ZIP. License: AITextured Free Commercial License (FCL) v1.1. Free personal and commercial use. Raw resale, standalone redistribution, mirroring/scraping, competing asset packs, and AI/ML training are not allowed without written permission. Attribution is not required, but appreciated..

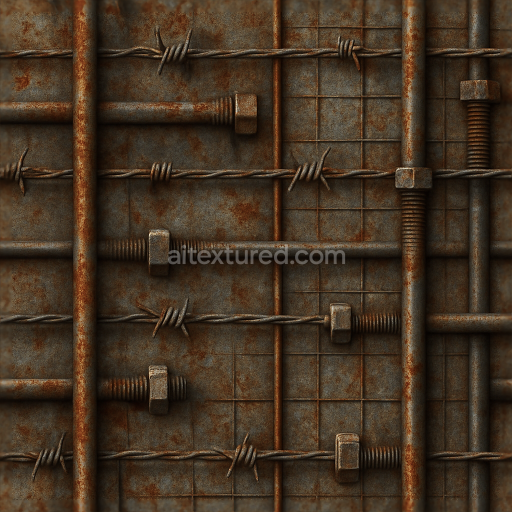
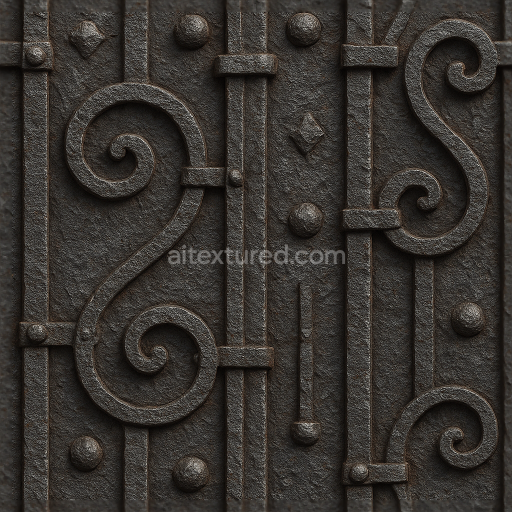
| ID | seamless-8k-3d-texture-pbr-black-fence-wrought-iron-with-spiked-fence-and-crossbeam-metal-bolts |
|---|---|
| Category | Fences |
| Formats | PNG, WEBP, PBR ZIP |
| Size | 1k (1024x1024px), 2k (2048x2048px), 4k (4096x4096px), 8k (8192x8192px) |
| Color | sRGB |
| Tileable | Yes |
This seamless 8K PBR 3D texture depicts a black wrought iron fence characterized by vertical iron bars topped with sharp, pointed spikes and reinforced by horizontal crossbeams fastened with sturdy metal bolts. The material composition reflects traditional wrought iron, forged from iron combined with small amounts of carbon to enhance strength and malleability. The iron bars present a solid, tubular geometry with consistent diameter, while the spikes are conical and sharply tapered, providing a distinctive silhouette often associated with security fencing. The crossbeam structure is rectangular in profile, intersecting the vertical bars and joined with rounded, slightly raised metal bolts that add realistic mechanical detail. The overall form combines linear repetition and ornamental elements, creating an intricate yet orderly pattern suitable for seamless tiling across large surfaces.
The surface finish of this fence texture exhibits a rough, oxidized metal appearance typical of outdoor wrought iron exposed to weathering. The base substrate is dense iron metal, with oxidation layers forming a matte black patina interspersed with subtle rust tones and faint discolorations, indicative of prolonged exposure to humidity and air. The roughness channel captures micro-surface irregularities, contributing to diffuse light scattering and emphasizing the aged, somewhat corroded quality of the iron. The metallic channel reflects the highly conductive nature of iron, with a consistent value confirming the metal’s solid composition. Ambient occlusion enhances crevices around bolts and intersections where shadows naturally accumulate, while the height and normal maps provide fine surface detail such as pitting, scratches, and weld seams, enabling realistic depth perception and light interaction in 3D environments.
Color-wise, the BaseColor (Albedo) layer is dominated by deep black tones mixed with subtle rusty browns and dark grays from oxidation, accurately reproducing the complex coloration of weathered wrought iron. The normal map defines the subtle embossing and dents on the iron bars and spikes, enhancing tactile realism. Roughness varies moderately across the surface, with smoother areas on bolts and crossbeams contrasting with rougher, corroded iron bars. This variation enables nuanced reflections and helps convey the material’s history of wear. The height map supports parallax effects, allowing for enhanced perception of the fence’s three-dimensional details such as bolt heads and raised spikes when applied in real-time renderers.
Designed for seamless application, this texture is optimized at an 8K resolution to maintain exceptional detail even in close-up views, ensuring crispness and clarity for high-fidelity renders. It is fully compatible with major 3D software and game engines including Blender, Unreal Engine, and Unity, supporting all essential PBR channels for physically accurate lighting and shading. For practical use, it is recommended to carefully adjust UV scaling to preserve the natural proportions of the iron bars and spikes, avoiding distortion. Additionally, fine-tuning the roughness map can help achieve the desired weathering effect—lower values for polished areas, higher for rusted or rough patches. Blending height and normal maps can further enhance the perceived depth without excessive geometry complexity, making this texture versatile for architectural visualizations and interactive game environments requiring authentic wrought iron fence detailing.
Import the texture maps into Blender with sRGB color space for albedo/base color and Non-Color for normal, roughness, metallic, AO, height, and ORM maps. Connect normal maps through a Normal Map node, then adjust UV scale with a Mapping node so the material repeats naturally on your model.
For the full step-by-step setup, see How to Use Seamless Textures in Blender. Browse related material examples in wood, concrete, and metal.
Yes. This texture is designed as a seamless tileable PBR material, so it can repeat across large surfaces without visible borders.
You can download PNG/WEBP versions and use 1K, 2K, 4K and 8K download options when available on the page.
Yes. The download options and engine-mapped ZIP workflow are designed for Blender, Unreal Engine, Unity Standard, URP and HDRP material pipelines.
Yes. The texture is available under the AITextured free commercial license. Review the license page for redistribution and AI-training restrictions.

Build, preview, and export seamless PBR materials. Generate full map sets from a single image, inspect them in a real-time WebGL viewer, and re-package maps for Unreal, Unity, and Blender—directly in your browser.
AI text-to-texture: type a prompt and get a seamless, tileable base image ready for PBR workflows (great starting point for materials).
Create a full PBR set (Normal, Roughness, AO, Metallic, etc.) from a single image. Seamless and tiling-friendly.
Instant WebGL viewer: inspect materials on a sphere, plane, and cube. Check tiling and lighting in real time.
Re-packages maps per engine: Unreal (BaseColor + ORM), Unity (Mask/MetallicSmoothness), Blender (separate channels).
PNG ↔ JPG ↔ SVG: fast convert, SVG rasterize, embed/trace options, quality & background controls.