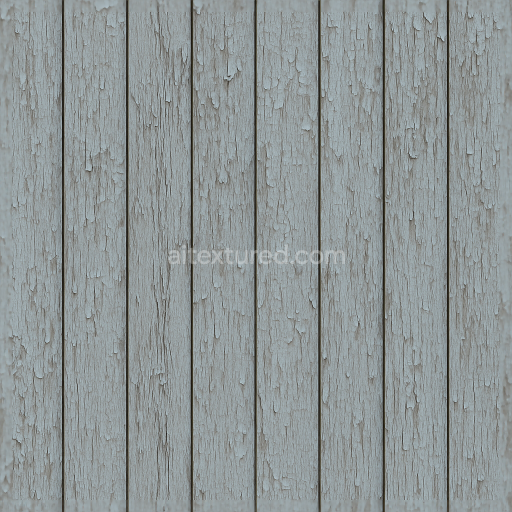
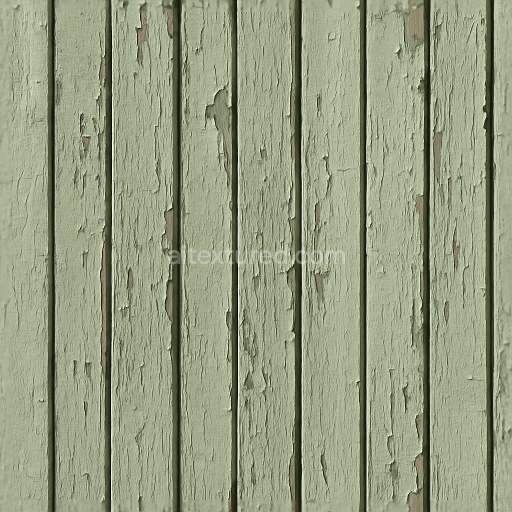
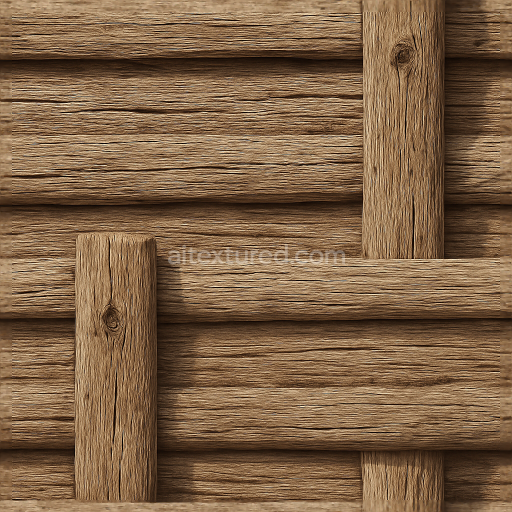
Privacy Fence With Painted Wood And Peeling Paint Effect
Seamless texture (tileable) · PNG, WEBP, PBR ZIP. License: AITextured Free Commercial License (FCL) v1.1. Free personal and commercial use. Raw resale, standalone redistribution, mirroring/scraping, competing asset packs, and AI/ML training are not allowed without written permission. Attribution is not required, but appreciated..

| ID | seamless-8k-3d-texture-pbr-rustic-picket-fence-with-painted-wood-and-peeling-paint-effect |
|---|---|
| Category | Fences |
| Formats | PNG, WEBP, PBR ZIP |
| Size | 1k (1024x1024px), 2k (2048x2048px), 4k (4096x4096px), 8k (8192x8192px) |
| Color | sRGB |
| Tileable | Yes |
This seamless 8K PBR 3D texture represents a rustic picket fence constructed from painted wood planks arranged vertically and evenly spaced, forming the classic geometric pattern typical of countryside fencing. The base material is solid wood, characterized by prominent grain patterns, natural knots, and occasional splinters, which contribute to the tactile roughness and authenticity of the surface. The wood substrate shows signs of weathering, with dry, cracked fibers and subtle porosity variations that reflect prolonged exposure to outdoor elements. The painted surface layer is semi-matte, exhibiting peeling paint flakes that partially reveal the underlying dry wood. This paint likely consists of traditional pigmented binders mixed with mineral fillers, contributing colorants that have faded unevenly, creating a nuanced blend of white and off-white hues with hints of exposed raw timber beneath. The fence posts maintain similar textural fidelity with additional wear marks and rounded edges, indicative of natural erosion and mechanical impact.
From a materials perspective, the texture’s layering is expertly captured across multiple PBR channels to simulate realistic light interaction. The BaseColor (Albedo) map conveys the contrast between chipped white paint and the warm brown tones of the underlying wood grain, while the Normal map emphasizes the tactile roughness of knots, splinters, and peeling edges, providing depth and subtle surface irregularities. The Roughness map varies across the texture, with higher values on exposed dry wood areas to reflect a matte, weathered finish, and slightly lower roughness on remaining paint patches that retain some smoothness. The Metallic channel remains near zero, as wood and paint are non-metallic materials, ensuring physically accurate reflections. Ambient Occlusion enhances shadowing in crevices such as around knots and under peeling paint, increasing visual depth. Height or Displacement maps capture the relief of the peeling paint layers and raised wood grain, allowing for enhanced parallax effects and realistic surface variation in 3D environments.
This texture is optimized for seamless tiling, making it ideal for large fence surfaces without visible repetition. Its 8K resolution ensures exquisite detail suitable for close-up renders and real-time applications in Blender, Unreal Engine, and Unity. The high resolution captures intricate wood grain patterns and subtle paint imperfections, preserving material authenticity even at extreme zoom levels. The texture’s form emphasizes vertical planks with slight spacing, and the organic irregularities of wood grain and peeling paint create a dynamic, natural appearance rather than a uniform pattern.
For practical use, it is advisable to carefully adjust the UV scale in your 3D software to match the intended fence dimensions, as this texture’s high detail can reveal repeating patterns if scaled improperly. Fine-tuning the roughness map can help achieve the desired wetness or dryness effect depending on scene lighting and environmental conditions. Additionally, blending the height map with a subtle normal map overlay can enhance the perception of depth, especially in real-time engines, without incurring significant performance costs. This approach ensures the rustic picket fence texture remains visually convincing under various lighting and viewing angles.
Import the texture maps into Blender with sRGB color space for albedo/base color and Non-Color for normal, roughness, metallic, AO, height, and ORM maps. Connect normal maps through a Normal Map node, then adjust UV scale with a Mapping node so the material repeats naturally on your model.
For the full step-by-step setup, see How to Use Seamless Textures in Blender. Browse related material examples in wood, concrete, and metal.
Yes. This texture is designed as a seamless tileable PBR material, so it can repeat across large surfaces without visible borders.
You can download PNG/WEBP versions and use 1K, 2K, 4K and 8K download options when available on the page.
Yes. The download options and engine-mapped ZIP workflow are designed for Blender, Unreal Engine, Unity Standard, URP and HDRP material pipelines.
Yes. The texture is available under the AITextured free commercial license. Review the license page for redistribution and AI-training restrictions.
Build, preview, and export seamless PBR materials. Generate full map sets from a single image, inspect them in a real-time WebGL viewer, and re-package maps for Unreal, Unity, and Blender—directly in your browser.
AI text-to-texture: type a prompt and get a seamless, tileable base image ready for PBR workflows (great starting point for materials).
Create a full PBR set (Normal, Roughness, AO, Metallic, etc.) from a single image. Seamless and tiling-friendly.
Instant WebGL viewer: inspect materials on a sphere, plane, and cube. Check tiling and lighting in real time.
Re-packages maps per engine: Unreal (BaseColor + ORM), Unity (Mask/MetallicSmoothness), Blender (separate channels).
PNG ↔ JPG ↔ SVG: fast convert, SVG rasterize, embed/trace options, quality & background controls.